How to Export and Erase Personal Data in WordPress

A few years ago, I got my first data deletion request from a user. I’ll admit, I panicked a little. I knew I needed to respect their privacy rights, but I had no idea how to actually remove their data from my WordPress site without breaking anything.
That experience led me to discover something helpful: WordPress has built-in tools made for exactly this situation. Once you know where to find them, they make handling data requests surprisingly easy.
In this guide, I’ll walk you through how to use Export and Erase Personal Data tools in WordPress.
Whether you’re preparing for GDPR, building trust with your users, or just want to be ready for future requests, this tutorial will help you do it with confidence.
💡 This guide focuses on using WordPress’ built-in tools to remove personal data.
However, these tools may not delete information collected by third-party plugins, especially if the plugin isn’t fully GDPR compliant.
In those cases, you’ll need to check the plugin’s settings or contact the developer directly to make sure all personal data is removed.
What is Personal Data?
Personal data is any information that can be used to identify a person, either directly or indirectly.
On a WordPress site, this includes obvious details like names, usernames, and email addresses.
These are often collected when someone creates an account on your website, submits a contact form, subscribes to your email newsletter using a plugin like WPForms, or leaves a comment on a blog post.
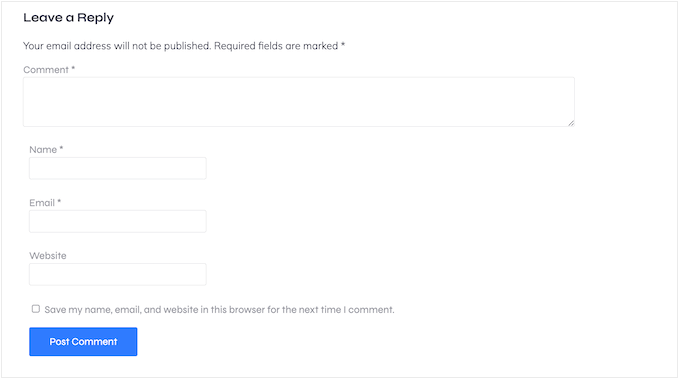
It also includes technical data like IP addresses, which can reveal a visitor’s general location. Analytics tools, comment systems, and security plugins often collect this by default.
Personal data can also include behavioral information, such as page views, session activity, or form responses that show user preferences. Even metadata—like the time someone submitted a comment or logged in—counts as personal data under most privacy laws.
All of this information can help build a profile of your users, which is why it’s important to manage it carefully.
Why Data Privacy Matters in WordPress
Privacy laws like the General Data Protection Regulation (GDPR) in Europe and the California Consumer Privacy Act (CCPA) in the U.S. give users the right to access and delete their personal data. If you run a WordPress site, it’s important to follow these laws and show your visitors that you respect their rights.
Here’s why that matters:
- You’re legally required to comply. Under laws like the GDPR, you must give users access to their data or delete it upon request. Failing to do so can lead to serious legal trouble, including expensive fines.
- It helps you build trust with your visitors. When people feel confident that you’re handling their data responsibly, they’re more likely to subscribe, make a purchase, or share their information with you.
If your site feels unsafe or unclear about privacy, then visitors may hesitate to engage or leave altogether.
Ready to learn how to export and erase user data in WordPress? Simply use the quick links below to jump to the section you want to read first:
How to Accept Data Export and Deletion Requests
If someone wants to access or delete their personal data, then you’ll need a simple way for them to send that request.
The easiest method is to add a form to your WordPress site that collects their name, email address, and any extra details you need to identify them.
I recommend using WPForms for this. It’s beginner-friendly and includes ready-made templates like ‘Right to Erasure Request Form’ and ‘Data Request Form’, so you don’t need to start from scratch.
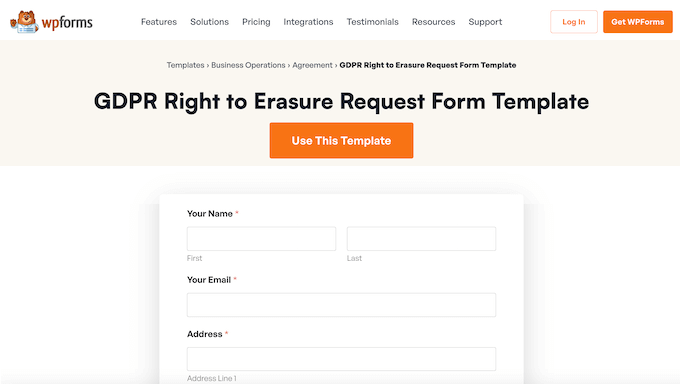
WPForms includes drag-and-drop templates that make it easy to build your form without starting from scratch. You can customize the fields and publish the form in just a few clicks.
🌟 Here at WPBeginner, we’re not just recommending WPForms – we built all our own forms with it! That’s right, from our contact pages to our online surveys, it’s all powered by WPForms.
We’ve put it to the test daily, and that’s why I’m so confident in telling you it’s the real deal. Want to learn more? Then dive into our detailed WPForms review.
There is a WPForms Lite version that is 100% free to use. However, we’ll be using WPForms Pro in this guide because it comes with the ‘Right to Erasure Request Form’ and ‘Data Request’ templates.
First, you’ll need to install and activate WPForms Pro. If you need help, please see our guide on how to install a WordPress plugin.
Once the plugin has been activated, head over to WPForms » Settings in your WordPress dashboard.
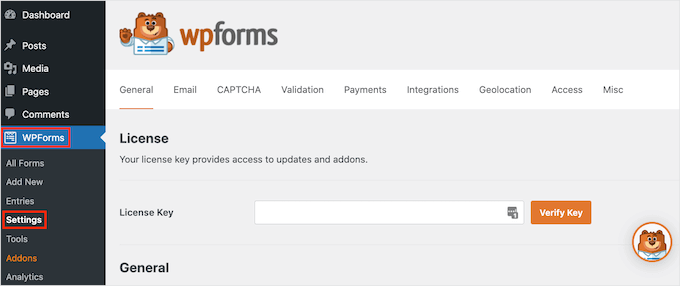
From here, the first thing you have to do is enter your license key into the ‘License Key’ field. You can find this information in your WPForms account.
That done, head over to WPForms » Add New.

Here, type a name for your form into the ‘Name Your Form’ field.
Your site visitors won’t see the name, so it’s just for your reference.
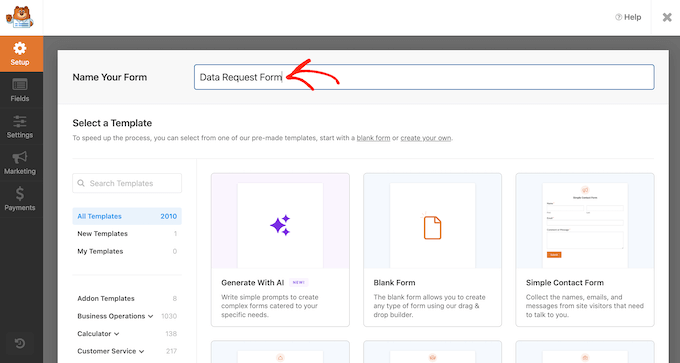
Now, you’ll need to select the template you want to use.
In the search field, start typing in either ‘Right to Erasure Request Form’ or ‘Data Request’, depending on the kind of form you want to create.
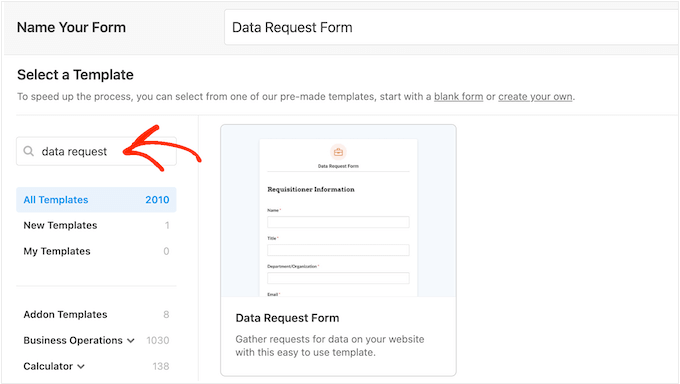
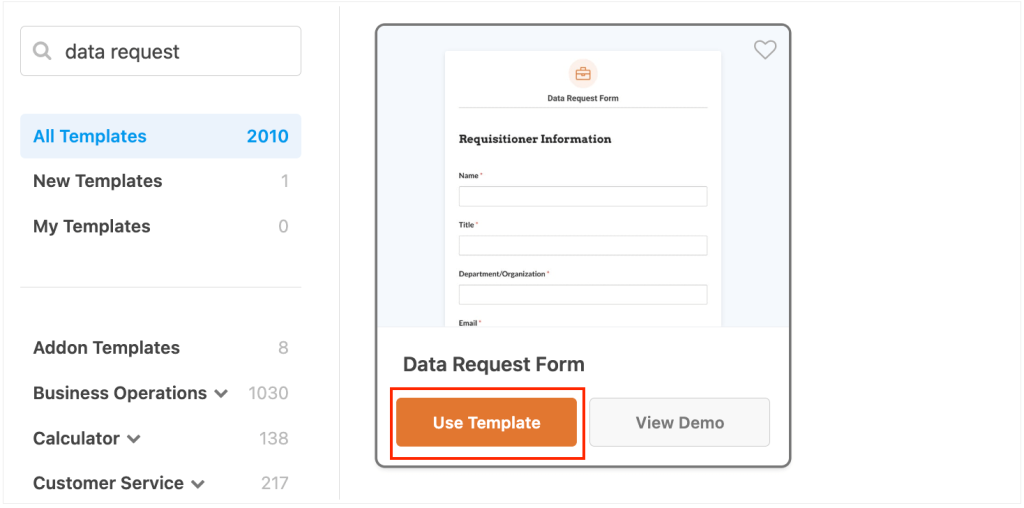
When you find the template you want to use, simply click its ‘Use Template’ button.
This will launch WPForms’ drag-and-drop form builder.
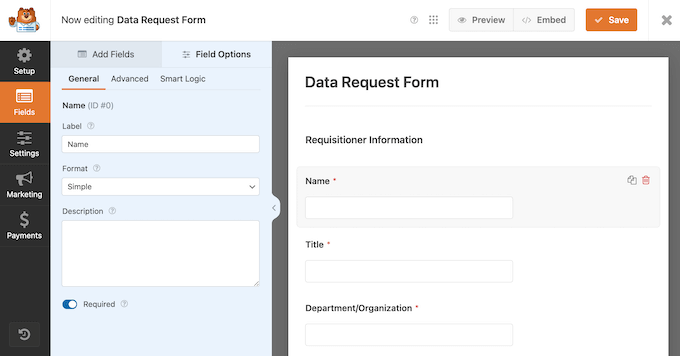
Here, you’ll see a live preview on the right and form fields in the left-hand menu.
To customize any of the template’s built-in fields, simply click to select that field. The left-hand menu will then show all the settings you can use to customize it.
Want to add more fields to your form?
Just find the field you want on the left side of your screen and drag and drop it right into your form’s live preview.

For more detailed instructions, see our tutorial on how to create a contact form in WordPress.
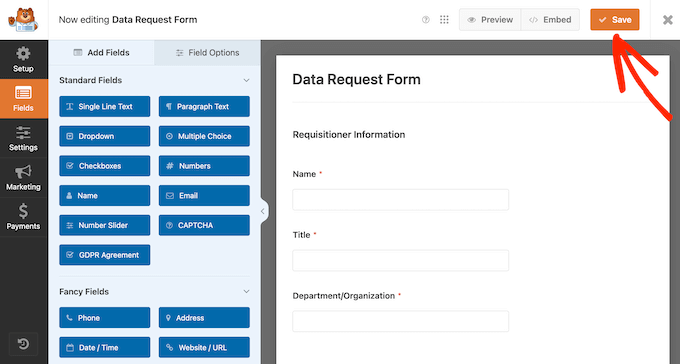
Once you’re happy with your form, simply click the ‘Save’ button at the top to close the form builder.
Next, open the page or post where you want to add the form that you just created.
From here, click the add block ‘+’ button.
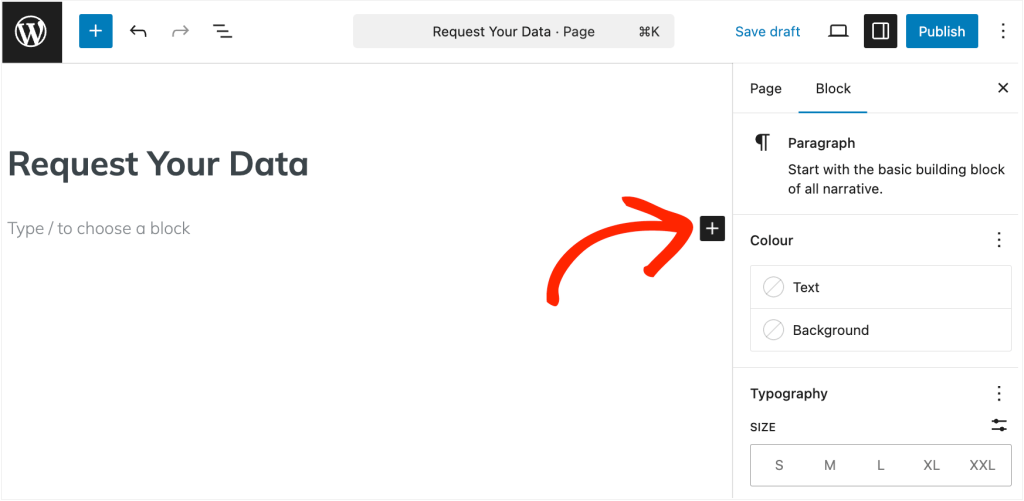
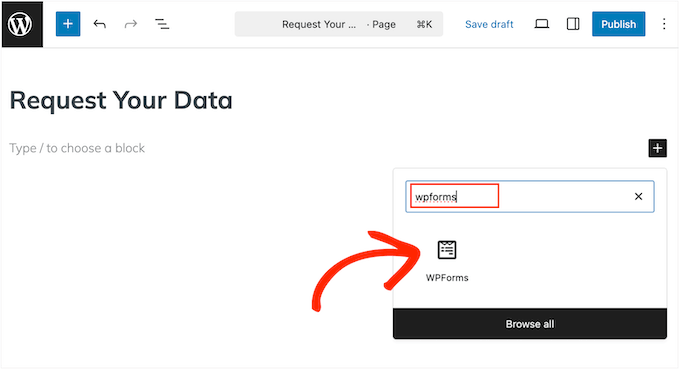
In the popup that appears, start typing in ‘WPForms.’
When the right block appears, simply click to add it to the page or post.
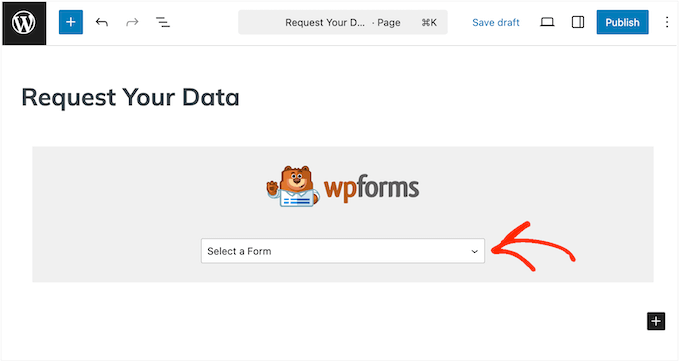
Once you’ve done that, you need to open the block’s dropdown menu and select the form you just created.
You can now publish or update this page as normal to make the form live on your site.
Now, simply repeat this process to create separate forms for data access requests and data erasure requests.
How to Monitor Data Access and Erasure Requests
Once your forms are live, you’ll need a way to track incoming data request submissions from your users.
Fortunately, WPForms makes this easy by storing every form entry in your WordPress dashboard.
To find these requests, just go to WPForms » Entries.
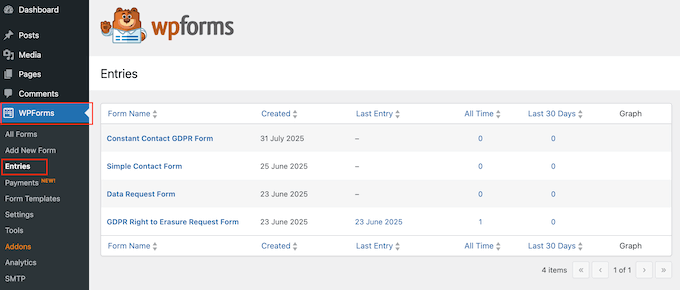
Simply click on the form you want to review.
You’ll now see a list of submissions, including any data access or erasure requests users have sent.
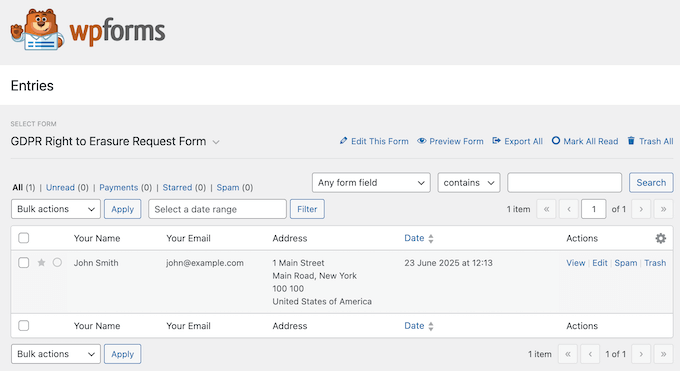
To stay compliant with privacy laws like the General Data Protection Regulation (GDPR), it’s important to review and respond to these requests promptly.
Now, I’ll show you how to export and erase personal data in WordPress.
How to Export Personal Data in WordPress
When someone requests a copy of their personal data, WordPress has a built-in tool that lets you export that information and send them a link to download it.
This step is required under privacy laws like the Personal Data Protection Law (PDPL). It’s also a good way to build trust with your users by showing them exactly what data you’ve collected from them.
💡WordPress sends the data export link via email, so it’s vital these messages arrive safely in their inbox and not the spam folder. That’s why I recommend setting up an SMTP plugin like WP Mail SMTP.
We use this plugin on WPBeginner, and it’s had a big impact on our email deliverability rates. Want to learn more? Just read our in-depth WP Mail SMTP review.
To begin, you need to go to Tools » Export Personal Data in your WordPress dashboard.
From here, you’ll enter the user’s email address or username and choose how to handle the request.
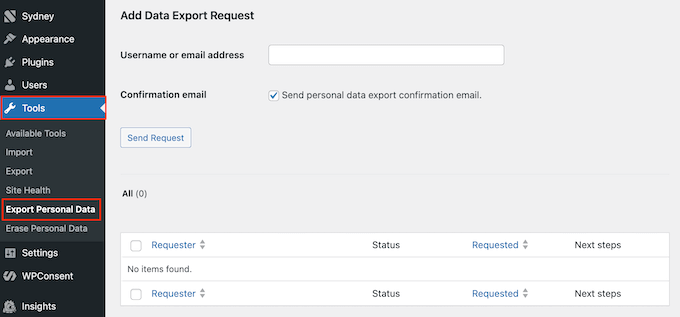
At this point, you have two options: you can either create the request directly in your WordPress dashboard, or you can send the user an email asking them to confirm that they want to export their data.
Let’s explore both options.
Option 1: Request Confirmation via Email
If you want to make sure the request is genuine, WordPress lets you send a confirmation email first. This is a good option when you’re unsure about the user’s identity.
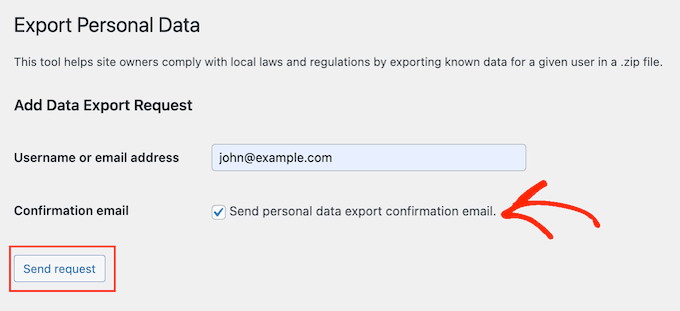
To do this, check the box next to ‘Send personal data export confirmation email.’ Then click on ‘Send request.’
The user will receive an email with a confirmation link.
They simply need to click on it.
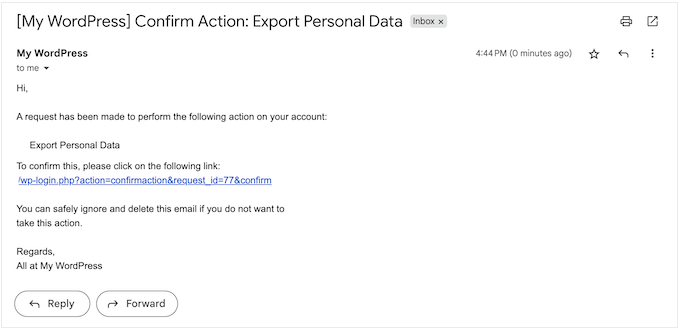
Then, they’ll see the following message:
“The site administrator has been notified. You will receive a link to download your export via email when they fulfil your request.”
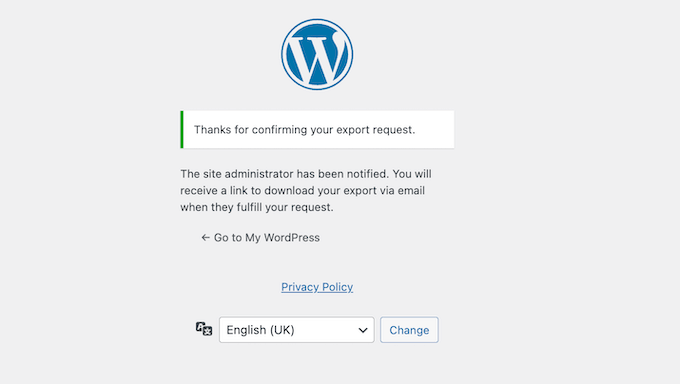
WordPress will now notify you via email.
This email includes some basic information about the user who made the request.
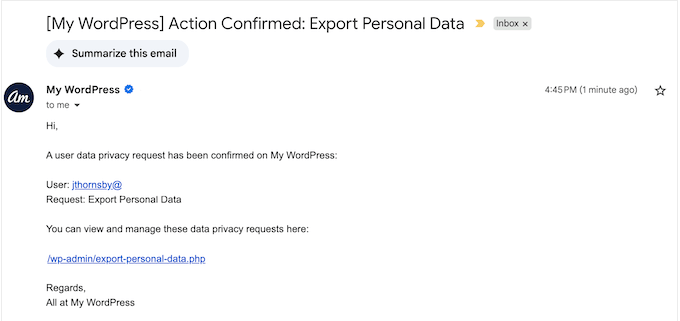
You can click the link in this email to go straight to the Tools » Export Personal Data screen.
Here, you’ll see the user’s request is now marked as ‘Confirmed.’
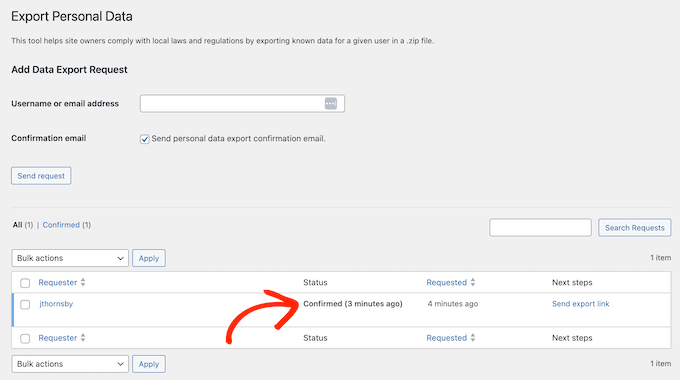
To go ahead and process this request, click on ‘Send export link.’
With that done, the user will receive an email containing a link to download their data as a ZIP file.
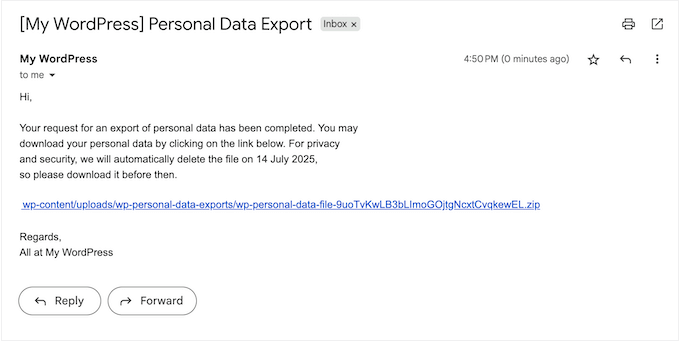
Now, WordPress will mark the request as ‘Completed’ in your dashboard. The request will also appear in a separate ‘Completed’ tab, along with all your other completed data export requests.
In this way, WordPress creates a complete record of all your completed requests. This means you can prove your compliance if you’re ever audited or someone questions your privacy practices.

With that in mind, I recommend keeping a complete log.
However, if you want to remove a completed request at any point, just click its ‘Remove Request’ link.

Option 2: Export the Data Immediately
Alternatively, you can create a data request directly in your WordPress dashboard without sending a confirmation email first.
This is helpful if you need to process the data request immediately or if you’re confident that the person making the request is genuine.
For example, they might use an email address that’s already linked to their account or contact you through a support channel where you’ve verified their identity.
In these cases, make sure to uncheck the box next to ‘Send personal data export confirmation email.’
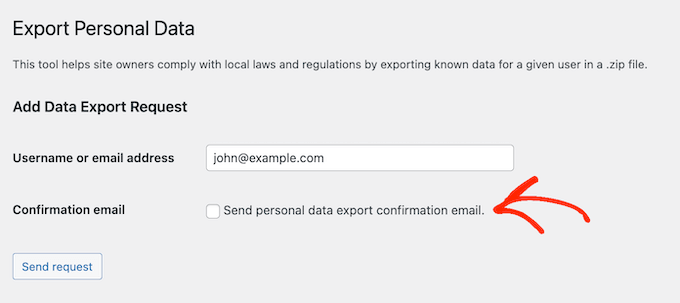
Then, go ahead and click ‘Send request.’
This creates the request in your WordPress dashboard, with the status ‘Confirmed.’
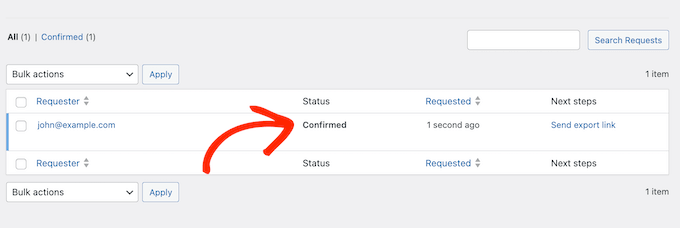
To send this person an email with a link to download their data, just click ‘Send export link.’
You can see an example of how this email looks in the previous section.

As I mentioned before, WordPress will now mark this request as ‘Completed’ in your dashboard. Once again, this is proof that you acted on the visitor’s request, which will be invaluable if you ever need to prove your compliance.
How to Erase Personal Data in WordPress
If someone asks you to delete their personal data, then WordPress has a built-in tool that helps you do that safely.
This step is required under privacy laws like the Virginia Consumer Data Protection Act (VCDPA), and it’s a key part of staying compliant with GDPR, PDPL, and other international regulations.
The process is similar to exporting data: you create a request, optionally confirm it by email, and then erase the data from your WordPress dashboard.
To begin, go to Tools » Erase Personal Data in your WordPress admin area.
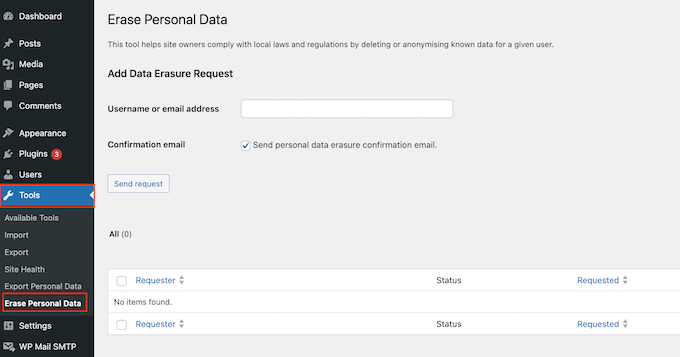
In the ‘Username or email address’ field, just type in the email address or username of the person who has asked you to delete their personal data.
At this point, you can either send a confirmation email to the user or go ahead and create the request in your WordPress dashboard.
Option 1: Send a Confirmation Email
To start, you can ask the user to confirm that they truly want to delete all their personal data.
Erasing a user’s data is a big step, so I suggest sending this email even if the request seems genuine because it gives the user a chance to change their mind.
To request confirmation, check the box next to ‘Send personal data erasure confirmation email.’
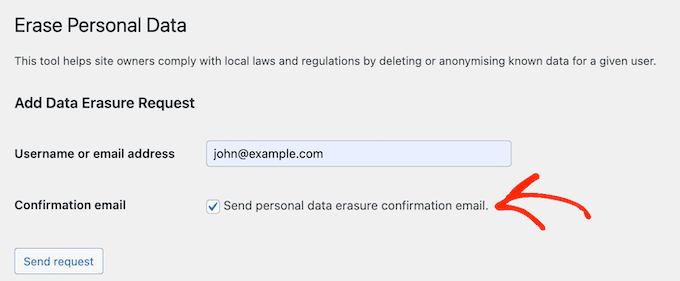
You can then click the ‘Send request’ button.
The user will now get an email about the data deletion request with a link to confirm that they want to delete their data.
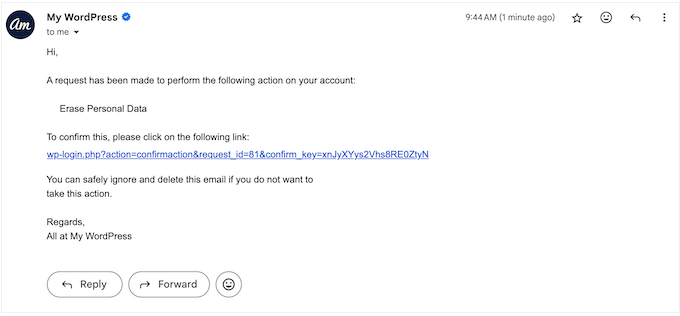
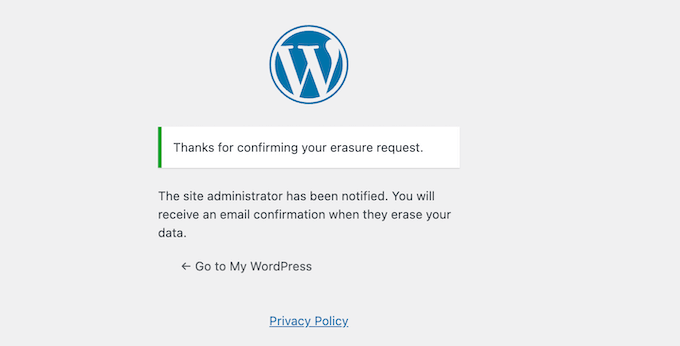
If they click this link, they’ll see a screen with this message:
“The site administrator has been notified. You will receive an email confirmation when they erase your data.”
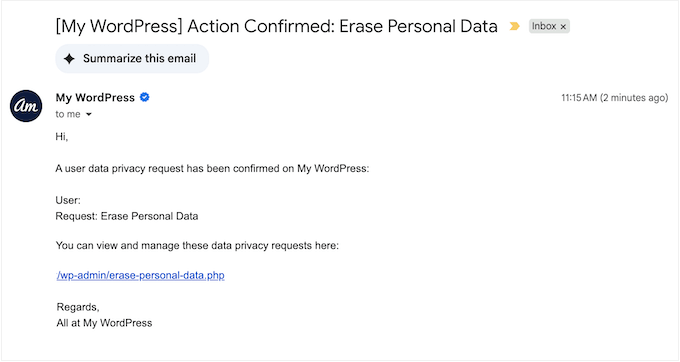
You will now get an email confirming that the user wants to erase their data.
To fulfil this request, either click the URL in the email or head back to the Tools » Erase Personal Data screen in your WordPress dashboard.
On this screen, you’ll see the user’s name with a ‘Confirmed’ status.
To go ahead and delete this person’s data, click on ‘Erase personal data.’

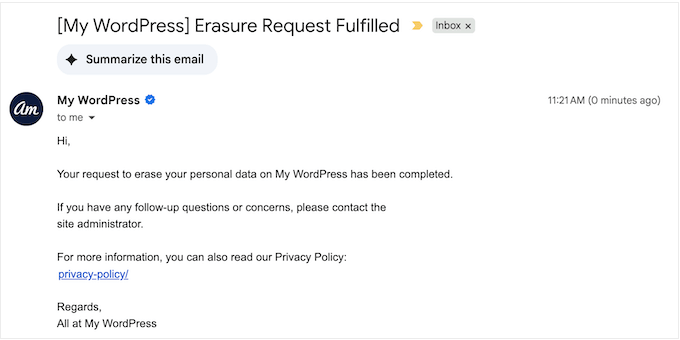
As soon as that’s done, WordPress will send the user an email confirming that you’ve removed their data.
This email also includes a link to your privacy policy, so the person can get more information if they want.
In your WordPress dashboard, this request will now be marked as ‘Completed.’
As I’ve already mentioned, having a record of these requests will be helpful if you’re ever audited.

Option 2: Delete the Data Immediately
Alternatively, you can create an erasure request directly in the WordPress dashboard without sending a confirmation email first.
This is useful if you need to act on a request straight away. It can also be handy when you’re confident that the request is genuine and the user definitely wants to delete all their personal data.
For example, you might get the request through a secure, verified login area on your membership site, which confirms the user’s identity.
In that case, make sure you uncheck the box next to ‘Send personal data erasure confirmation email.’ You can then go ahead and click on ‘Send Request.’
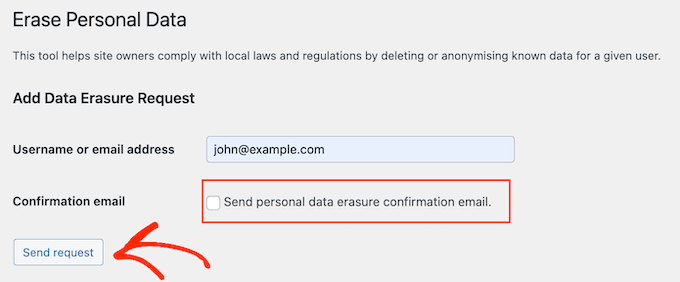
WordPress will now create this request in your dashboard and mark it as ‘Confirmed.’
To go ahead and process this request, click on ‘Erase personal data.’

Now, WordPress will send the person an email confirming that you’ve deleted their data.
As with data exports, WordPress will mark this request as ‘Completed.’
Ensure Your Site is Fully GDPR Compliant
Exporting and erasing personal data is an important step, but it’s not the only thing you need to do to make your WordPress compliant with different privacy laws.
To fully meet privacy standards like the General Data Protection Regulation (GDPR), you’ll also want to:
- Use GDPR-friendly plugins. You need to make sure the plugins you install handle personal data responsibly. You can start with our list of the best GDPR plugins for WordPress.
- Install a privacy compliance plugin. With a plugin like WPConsent, you can display cookie consent popups, record and manage user consent, and automatically block tracking scripts before users give their consent.
- Display a detailed privacy policy and cookie policy on your website. For details, see our guide on how to add a privacy policy in WordPress.
To see all our tips, you can read our complete guide to GDPR compliance in WordPress.
Bonus Tip: Create a Do Not Sell or Share My Personal Info Page
If your website gets visitors from California or other places with strict privacy laws, then you may have extra legal responsibilities. One of those is giving users a way to opt out of having their personal information sold or shared.
The easiest way to do this is by creating a “Do Not Sell or Share My Personal Info” page. This gives users a clear place to make opt-out requests and helps your site stay compliant with laws like the California Consumer Privacy Act (CCPA).
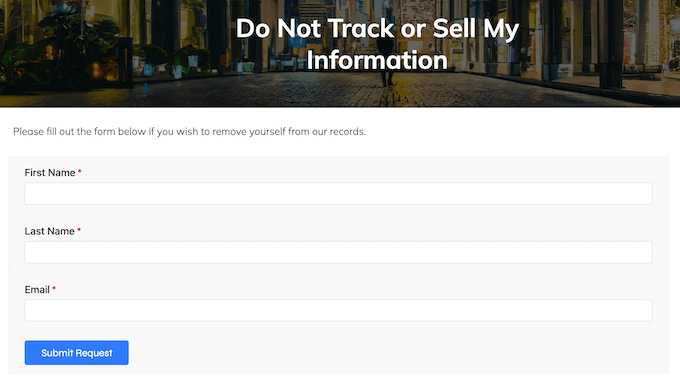
Your opt-out page should include a short explanation of your data practices and a simple form where visitors can submit their request. And fortunately, it’s easy to create this page with WPConsent.
WPConsent also lets you log these requests for your records and include consent options in your cookie popup, making it a great all-in-one solution.
To see step-by-step instructions, check out our full guide: How to Create a Do Not Sell My Info Page in WordPress.
FAQs About Personal Data Management in WordPress
Knowing how to manage personal data isn’t just about legal compliance—it also helps build trust with your audience.
To make things easier, I’ve answered some of the most common questions WordPress users have about handling personal information.
How Often Should I Review Data Requests in WordPress?
You should review data requests at least once every week or two.
This helps you catch any requests early and respond on time, especially if email notifications aren’t turned on.
If you’re using a plugin like WPForms or WPConsent, then make sure submission alerts are working so you don’t miss anything.
Regular reviews help you stay compliant with privacy laws and avoid delays when responding to users. It also shows your visitors that you take their privacy seriously.
Is Exporting WordPress Data Secure?
Yes, WordPress makes data exports secure by default. It even includes confirmation links to help verify each request.
To make your site even more secure, be sure to install an SSL certificate, use trusted security plugins, and keep everything up to date.
For more on this topic, please see our guide on how to improve your WordPress security.
How Do I Inform My Website Users About Their Data Rights?
You’re required to tell users about their data rights to stay transparent and follow privacy laws.
I recommend adding clear resources like a privacy policy, a cookie consent popup, and a Do Not Sell My Info Page.
These pages help users understand their rights and how to act on them while visiting your website.
How Can I Ensure My WordPress Website Complies with Privacy Laws?
Staying compliant with privacy laws goes beyond handling data export and deletion requests.
You may also need to create a cookie policy, write a full privacy policy, and let users opt out of sharing their personal data, depending on which laws apply to your site.
Each law is different, so be sure to research the specific regulations that affect your WordPress site or blog.
I hope this guide has helped you learn how to export and erase personal data in WordPress. Next, you may want to see our expert picks of the best GDPR plugins to improve compliance, or our guide on how to keep personally identifiable info out of Google Analytics.
If you liked this article, then please subscribe to our YouTube Channel for WordPress video tutorials. You can also find us on Twitter and Facebook.


