Making Your WordPress Featured Image Pop (Guide)

You’ve just finished work on an outstanding blog post. It’s engaging, informative, and optimized for search. Everyone will want to read this, right?
Here’s the problem, though: your target audience can’t tell that your article is awesome until they visit, and they won’t visit unless they have a good reason to think the post is worth reading.
To break the deadlock, you need to offer some kind of preview — a trailer that teases the best parts of the full movie.
That’s why every blog post needs a great featured image.
If you’re wondering how to create one, we’ve got you covered. In this guide, we’ll show you how to design, size, and optimize your featured images to make your content visually irresistible.
Let’s dive in!
What Are Featured Images, Exactly?
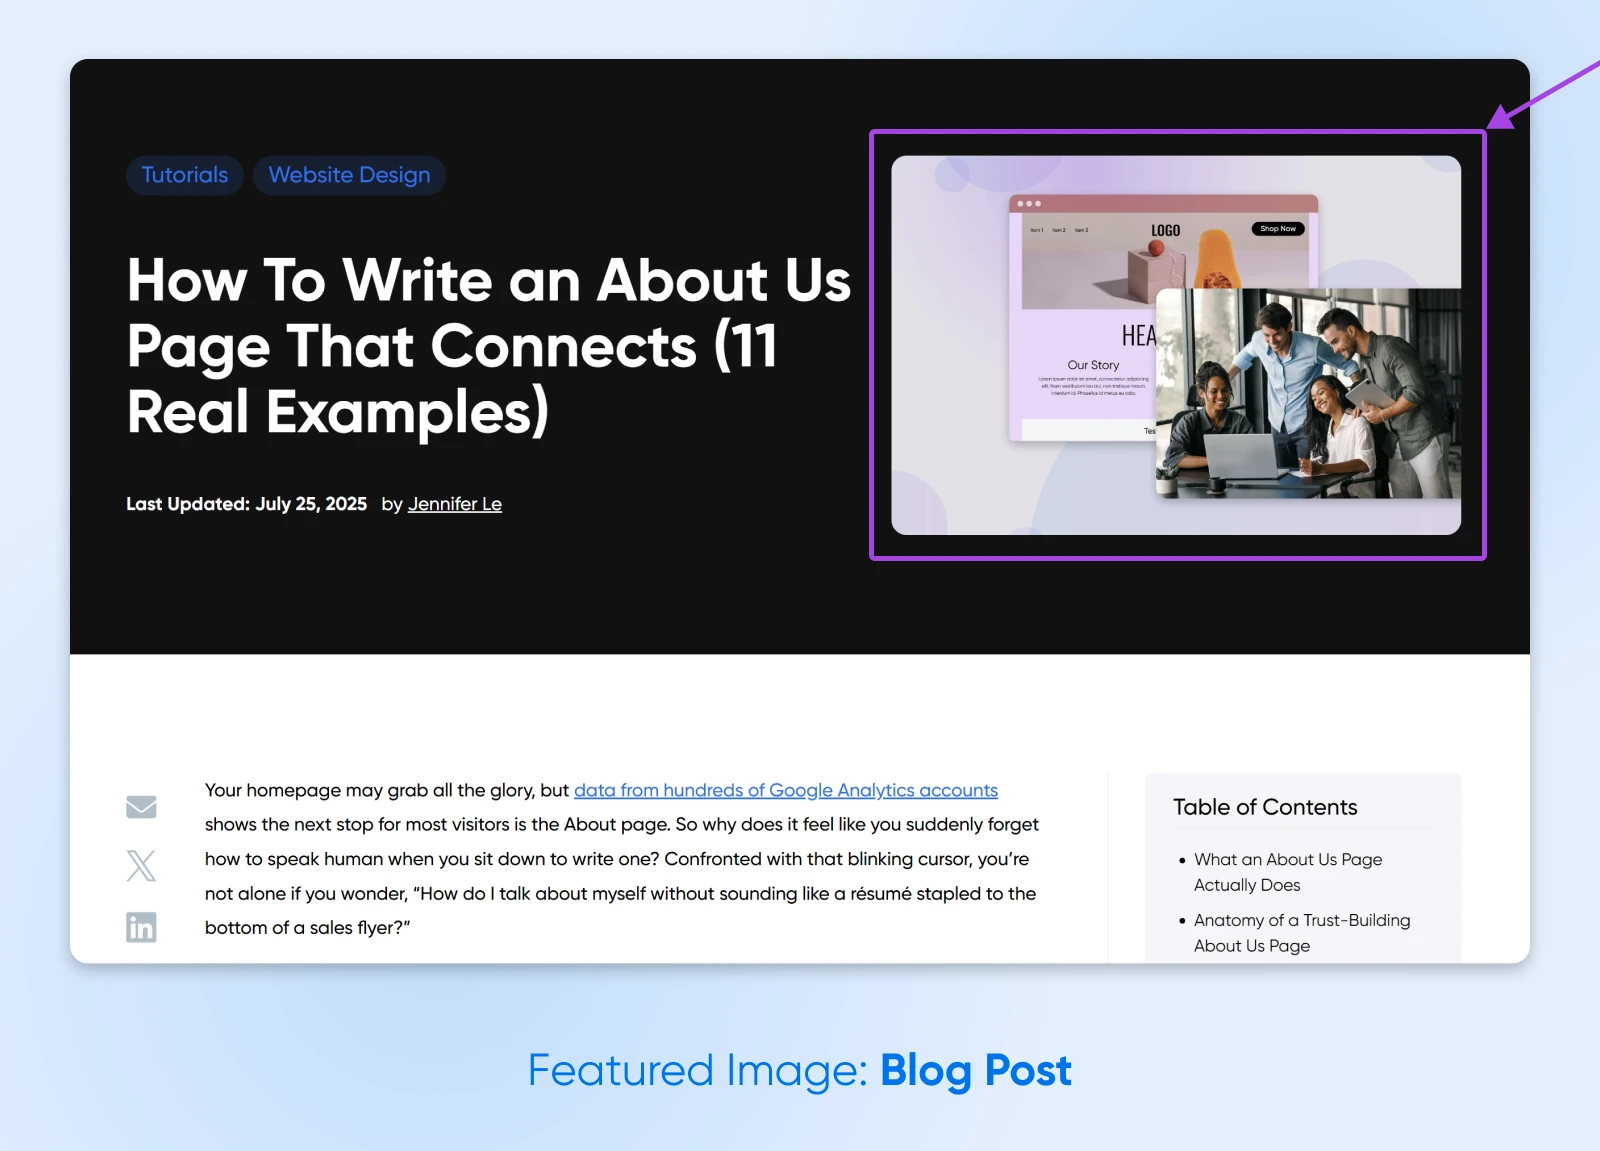
A featured image is a visual representation of a specific post, page, or custom post type. When someone visits your website, these images usually appear at the top of posts or in your blog feed.
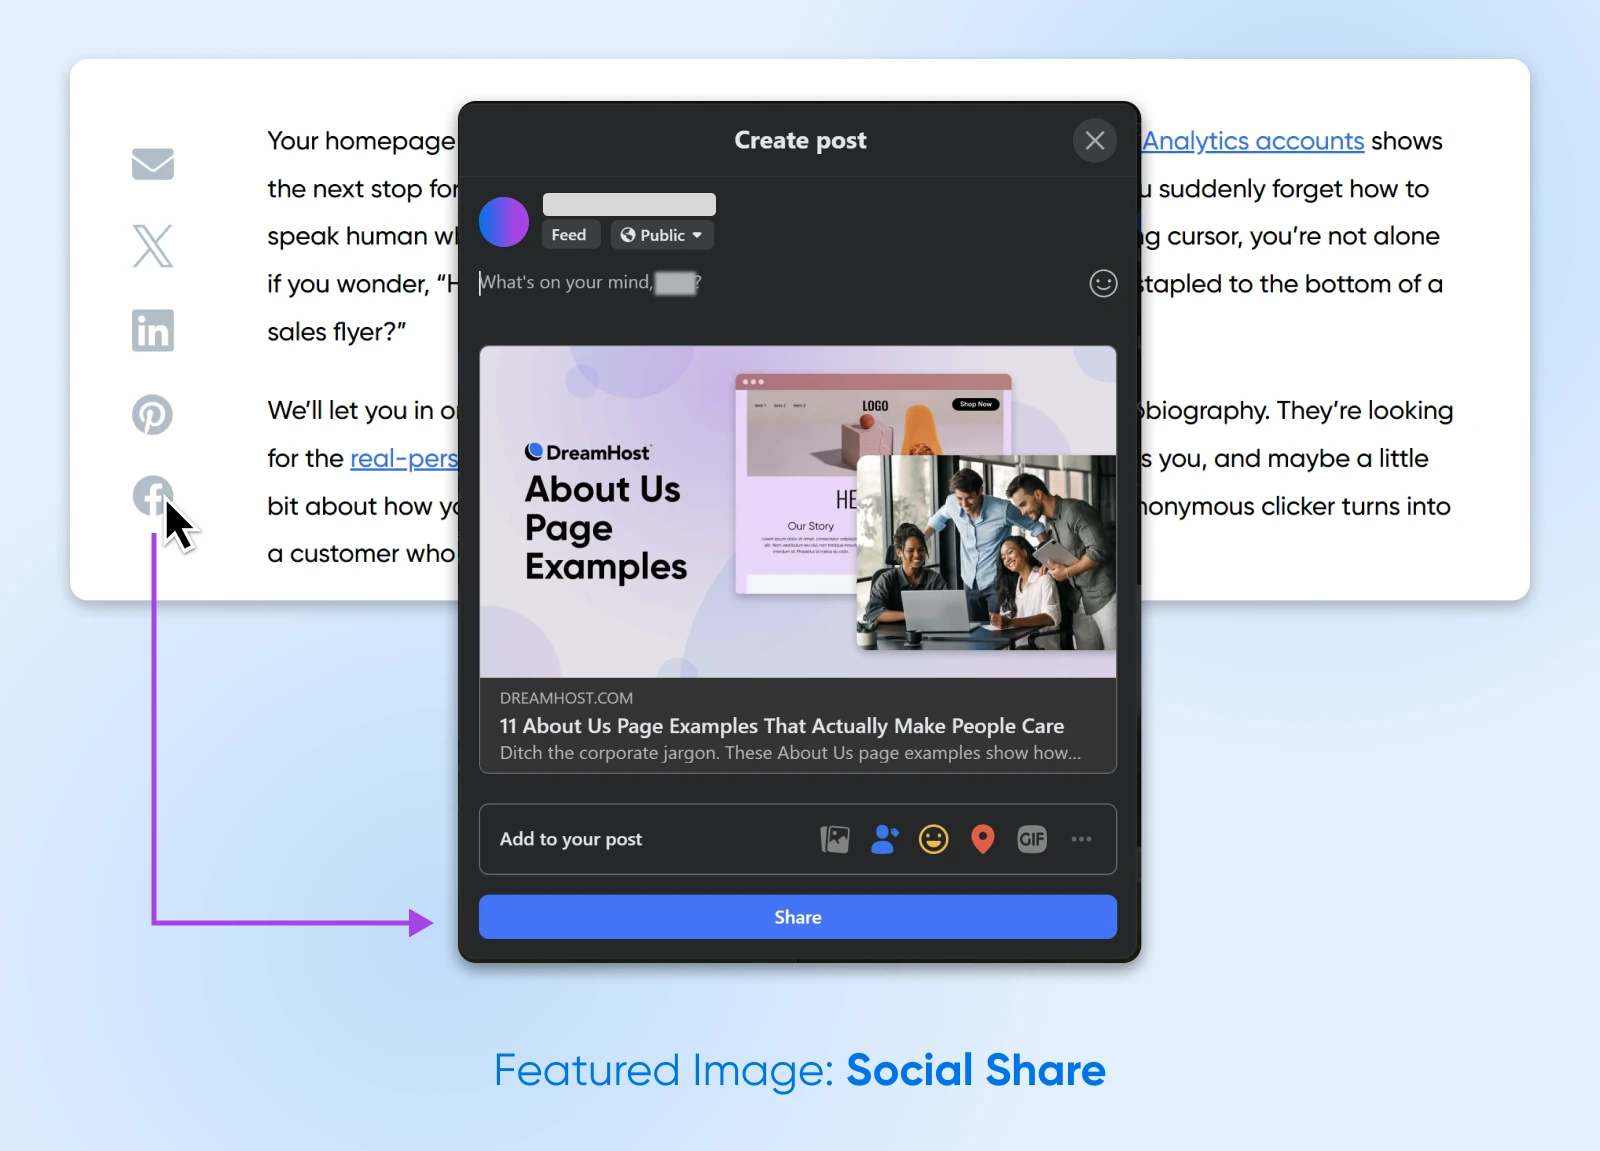
If someone shares your post on social media, the same image will appear with the link.
In WordPress, the location and size of your featured images are controlled by your theme. Featured images typically show up in the following places:
- The top area of posts or pages
- Pages on your website that link to blog posts, like your WordPress homepage, recommended posts section, or search results
- Thumbnails for social media links
Sometimes, featured images can be included in image galleries or sliders. This allows you to showcase your latest posts in a visual format.
Why You Should Always Set a Featured Image
Creating an image for every post sounds like a lot of effort. Does it really make that much difference?
Yes, actually. Good featured images can:
- Help users understand what your content is about: That means they’re more likely to visit your site and read your posts.
- Improve engagement when your content is shared on social platforms: This adds some visual appeal to the link, and gives users a sneak preview before they visit.
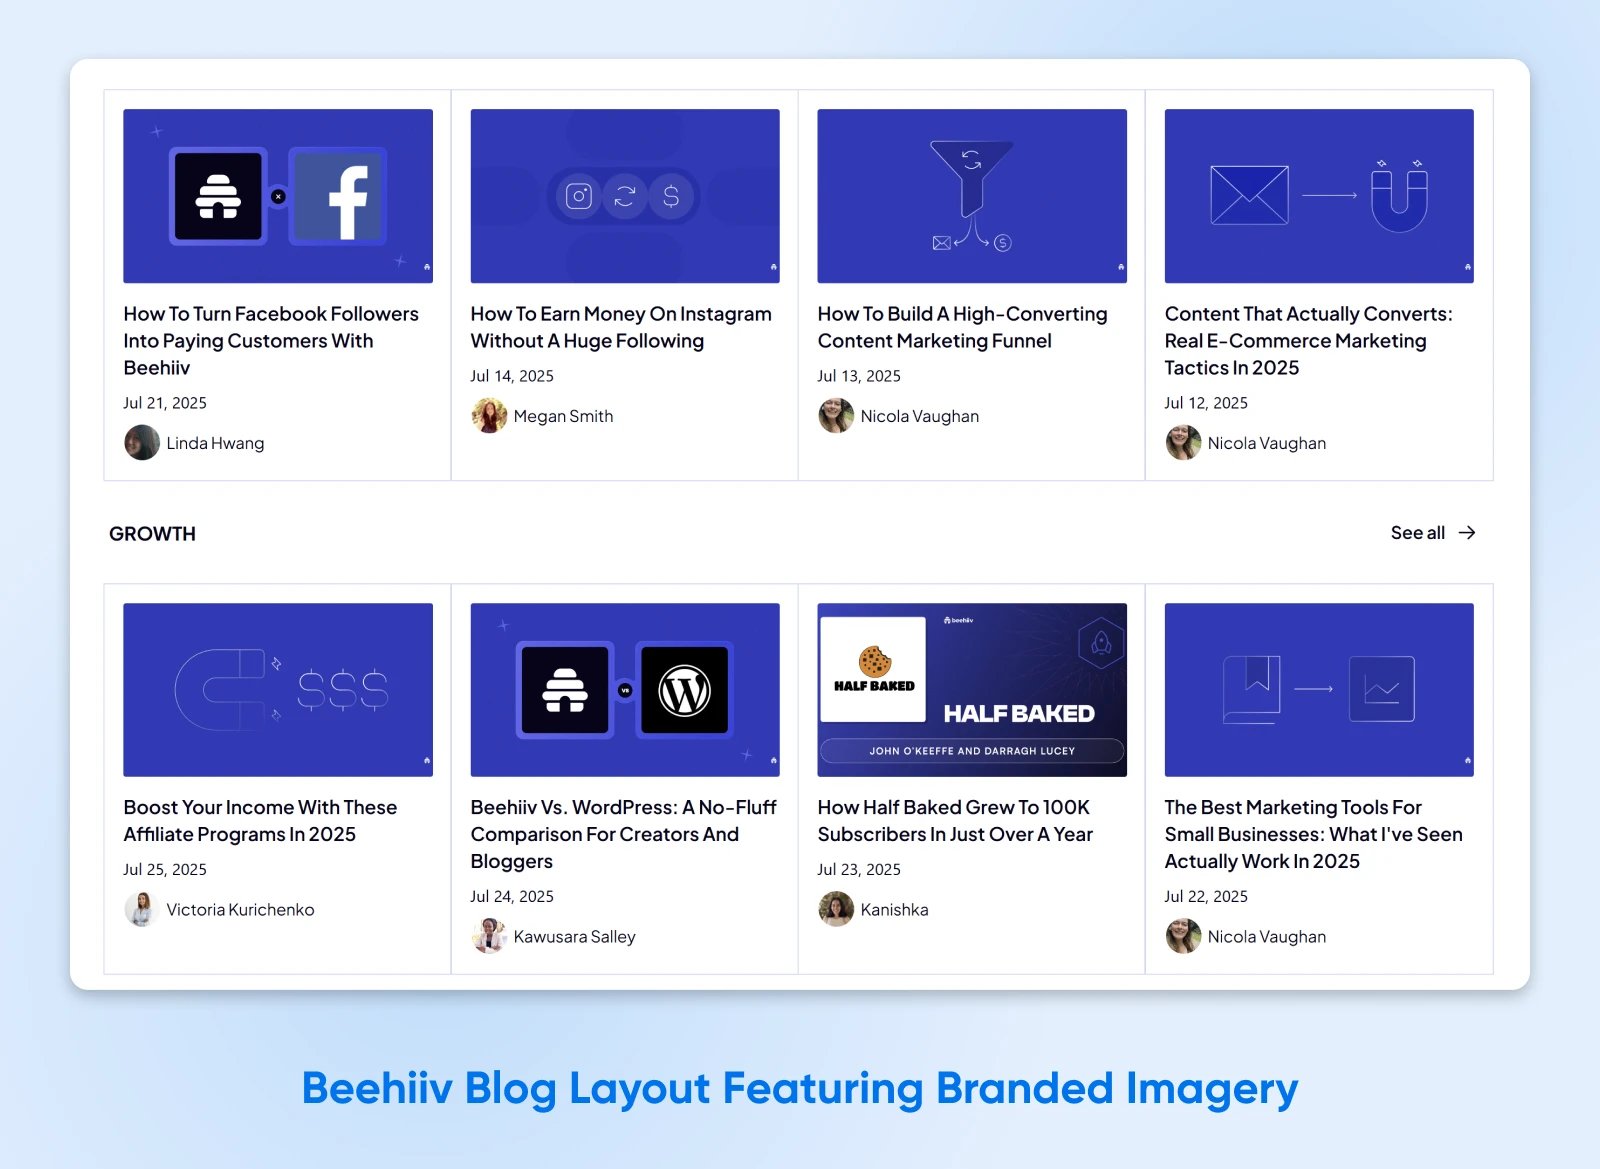
- Turn your blog page into a beautiful, branded mosaic: Stick with your brand colors and fonts, and those post thumbnails will make your site look super professional.
In this example from publishing platform Beehiiv, their consistent use of brand colors, minimalist icons, and structured layout contributes to a cohesive, professional visual identity.
In other words, this is one chore you shouldn’t skip.
The next question is, what does a good featured image look like? Let’s dive into that now.
The Perfect Size for a Featured Image Is…
While every site is a little different, most themes work best with featured images that measure 1200 × 628 px.
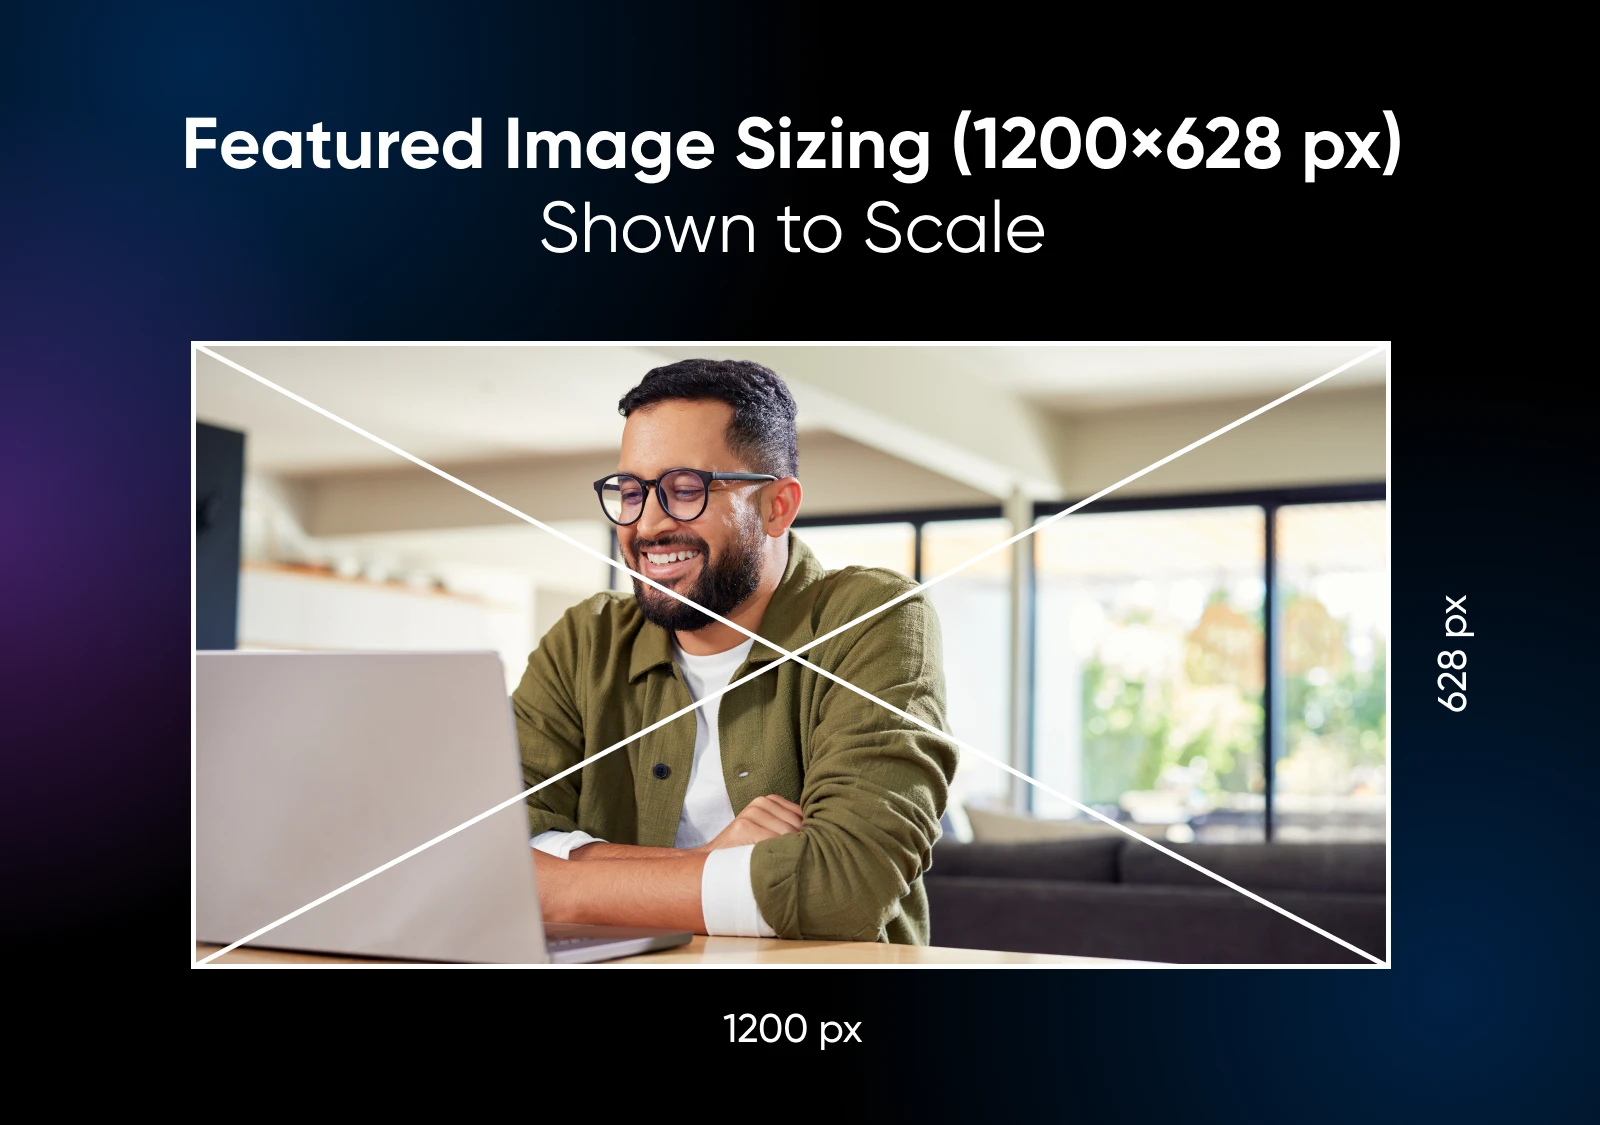
This featured image size also works well for social media previews.
That said, the folks at Jetpack suggest using slightly taller featured images (1200 × 800px) to maximize the space provided by Facebook, X, and other major platforms.
WordPress Will Resize Your Featured Images
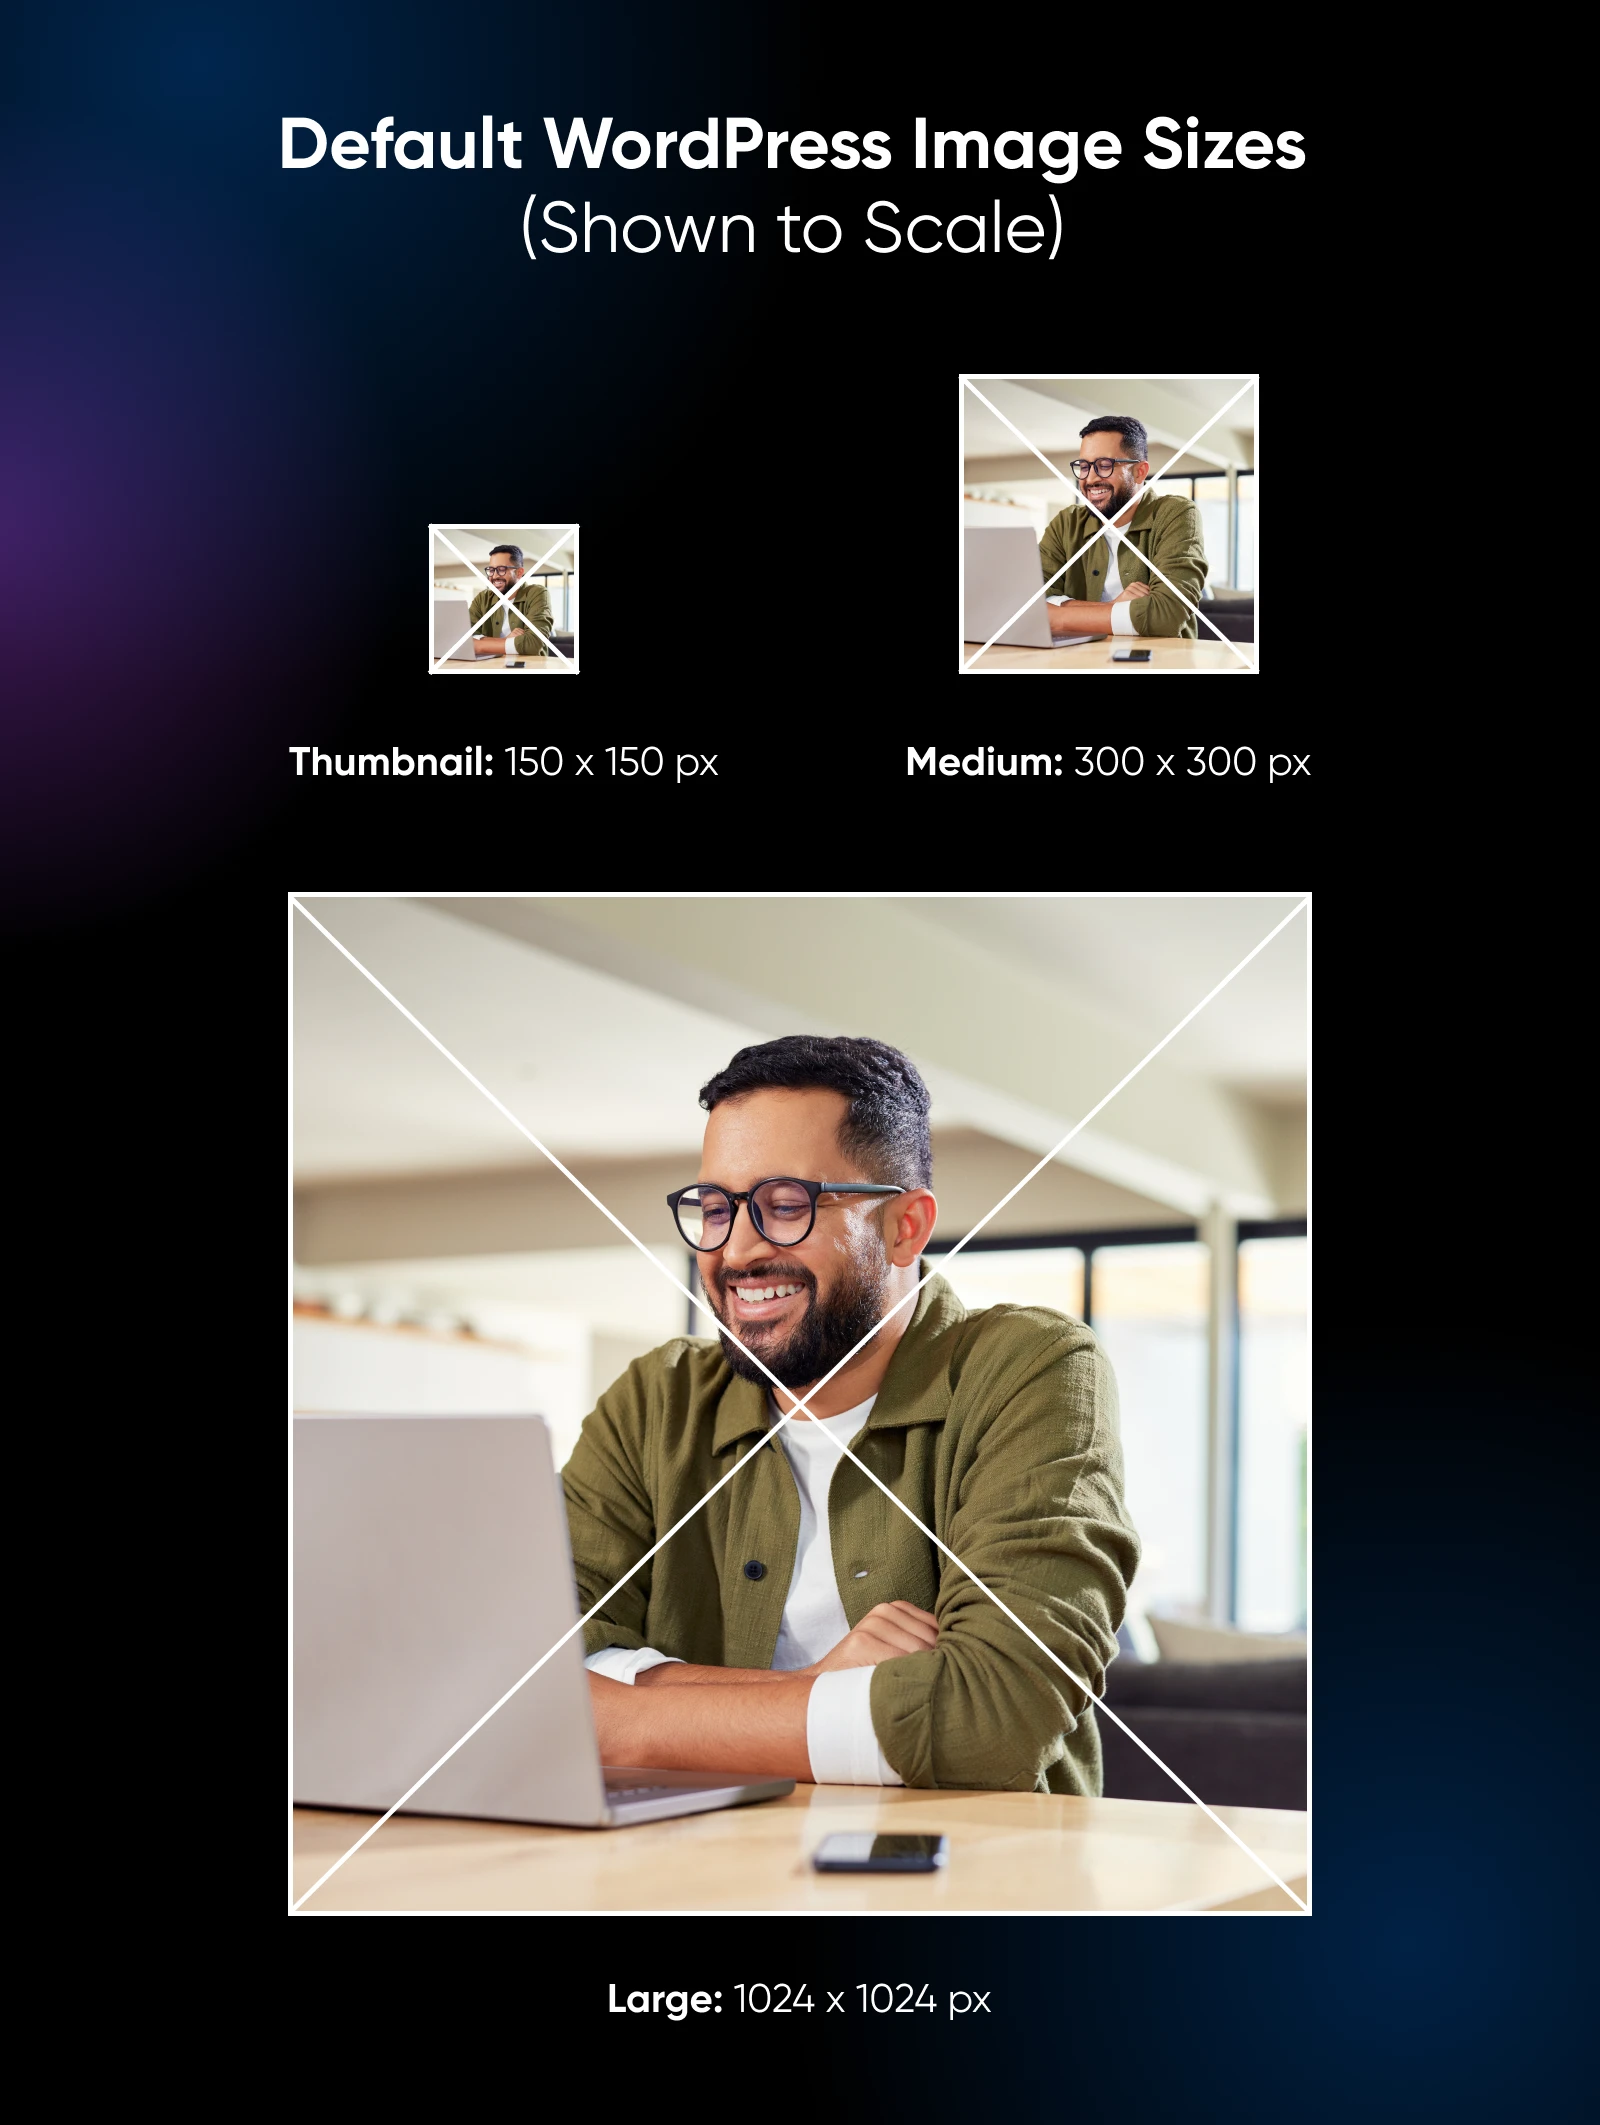
Running your site on WordPress? By default, any featured image you upload will be sliced and diced into three default versions:
- Thumbnail: 150 x 150 px
- Medium: 300 x 300 px
- Large: 1024 x 1024 px
If you want to keep the original size of your featured image, you’ll need to select the “Full Size” version. You can find these sizing options by navigating to Settings > Media in your WordPress dashboard.
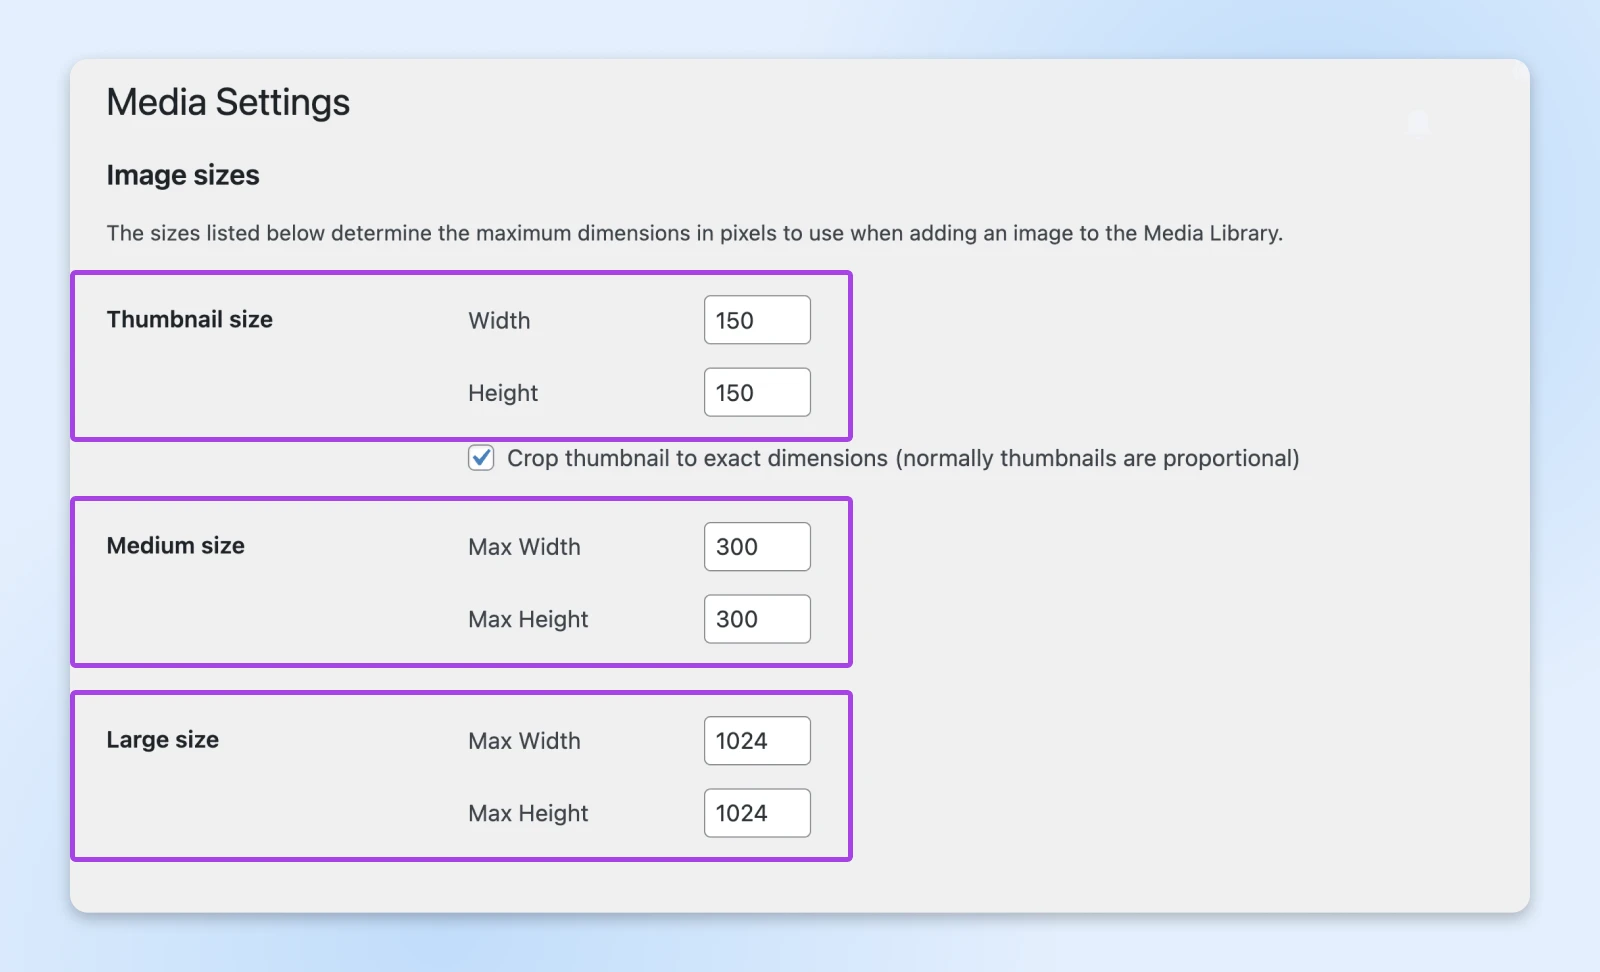
Here, you can update the width and height with new values. Once you save your changes, uploaded images will resize to these dimensions.
You can also add a custom featured image size to your theme code.
Before you do, it’s a good idea to back up your website and create a child theme. This allows you to change the code of your site without messing up the original theme.
Done that? Here’s the process:
1. Add the following code to your functions.php file:
add_image_size( string $name, int $width, int $height, bool|array $crop = false )
Update these values with your new featured image dimensions. For example:
add_image_size( ‘post-thumbnail size’, 800, 1500 );
2. To make sure your theme can handle the new image sizes, you’ll need to update the theme template file. Look for the update the_post_thumbnail() function, and make this small change:
if ( has_post_thumbnail() ) {the_post_thumbnail( ‘your-custom-size’ );}
Once you save the file, you’ll have a new custom-sized featured image!
The Right Way To Add a Featured Image in WordPress
Once you’re happy with your sizing, you can begin adding featured images.
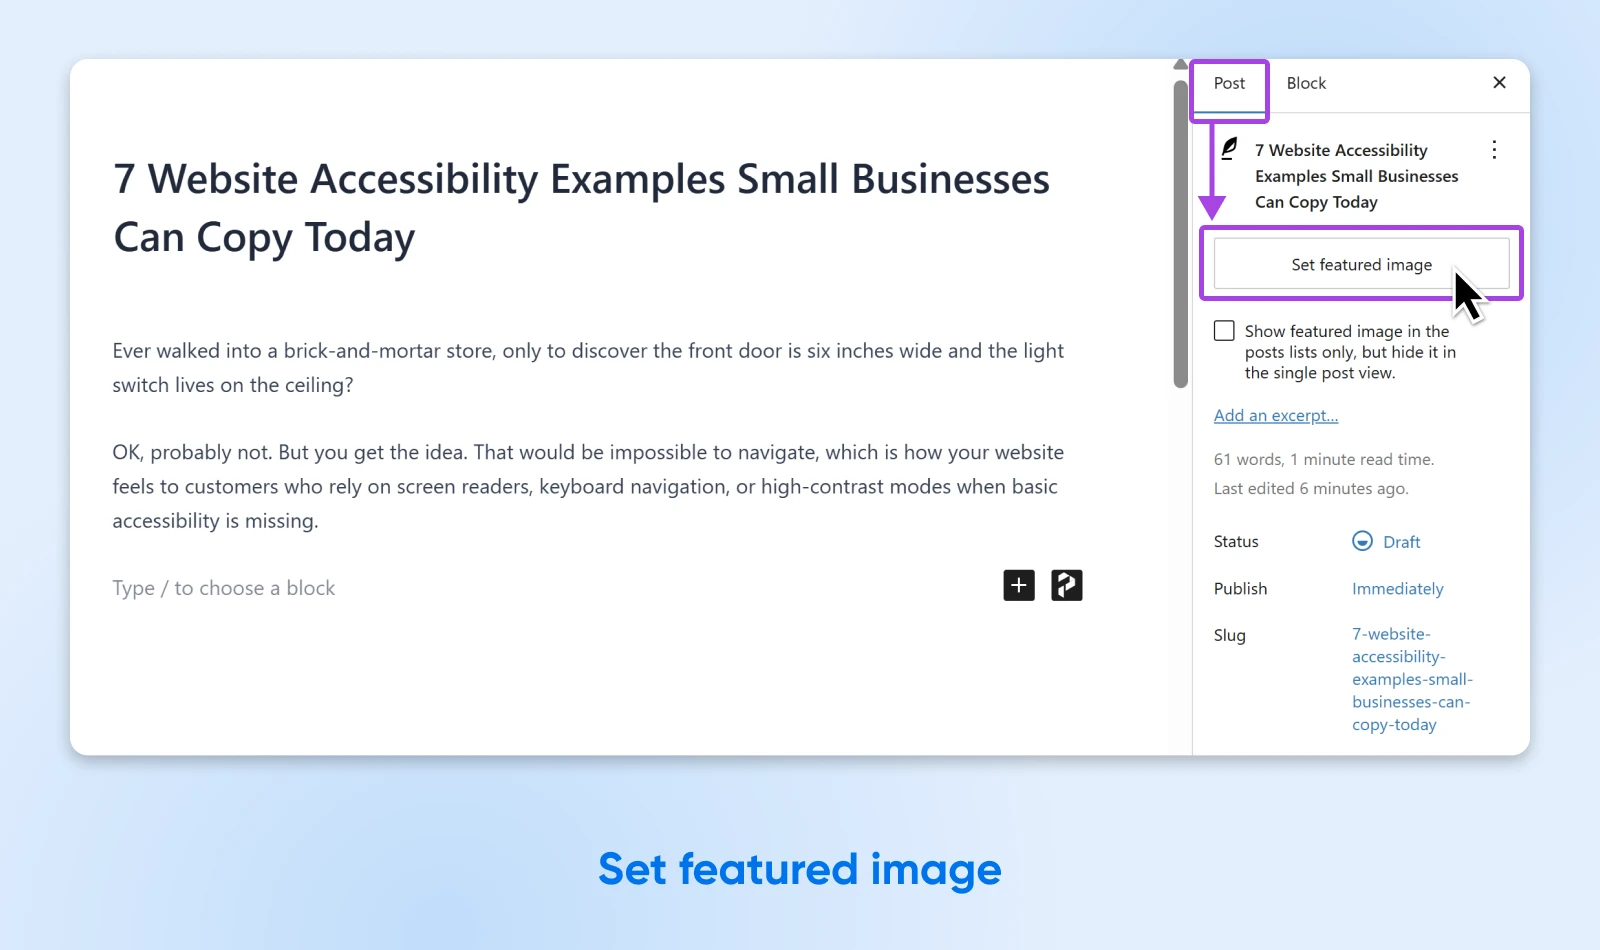
Start by creating a new post. Click the Post tab of the right-hand sidebar and then Featured Image.
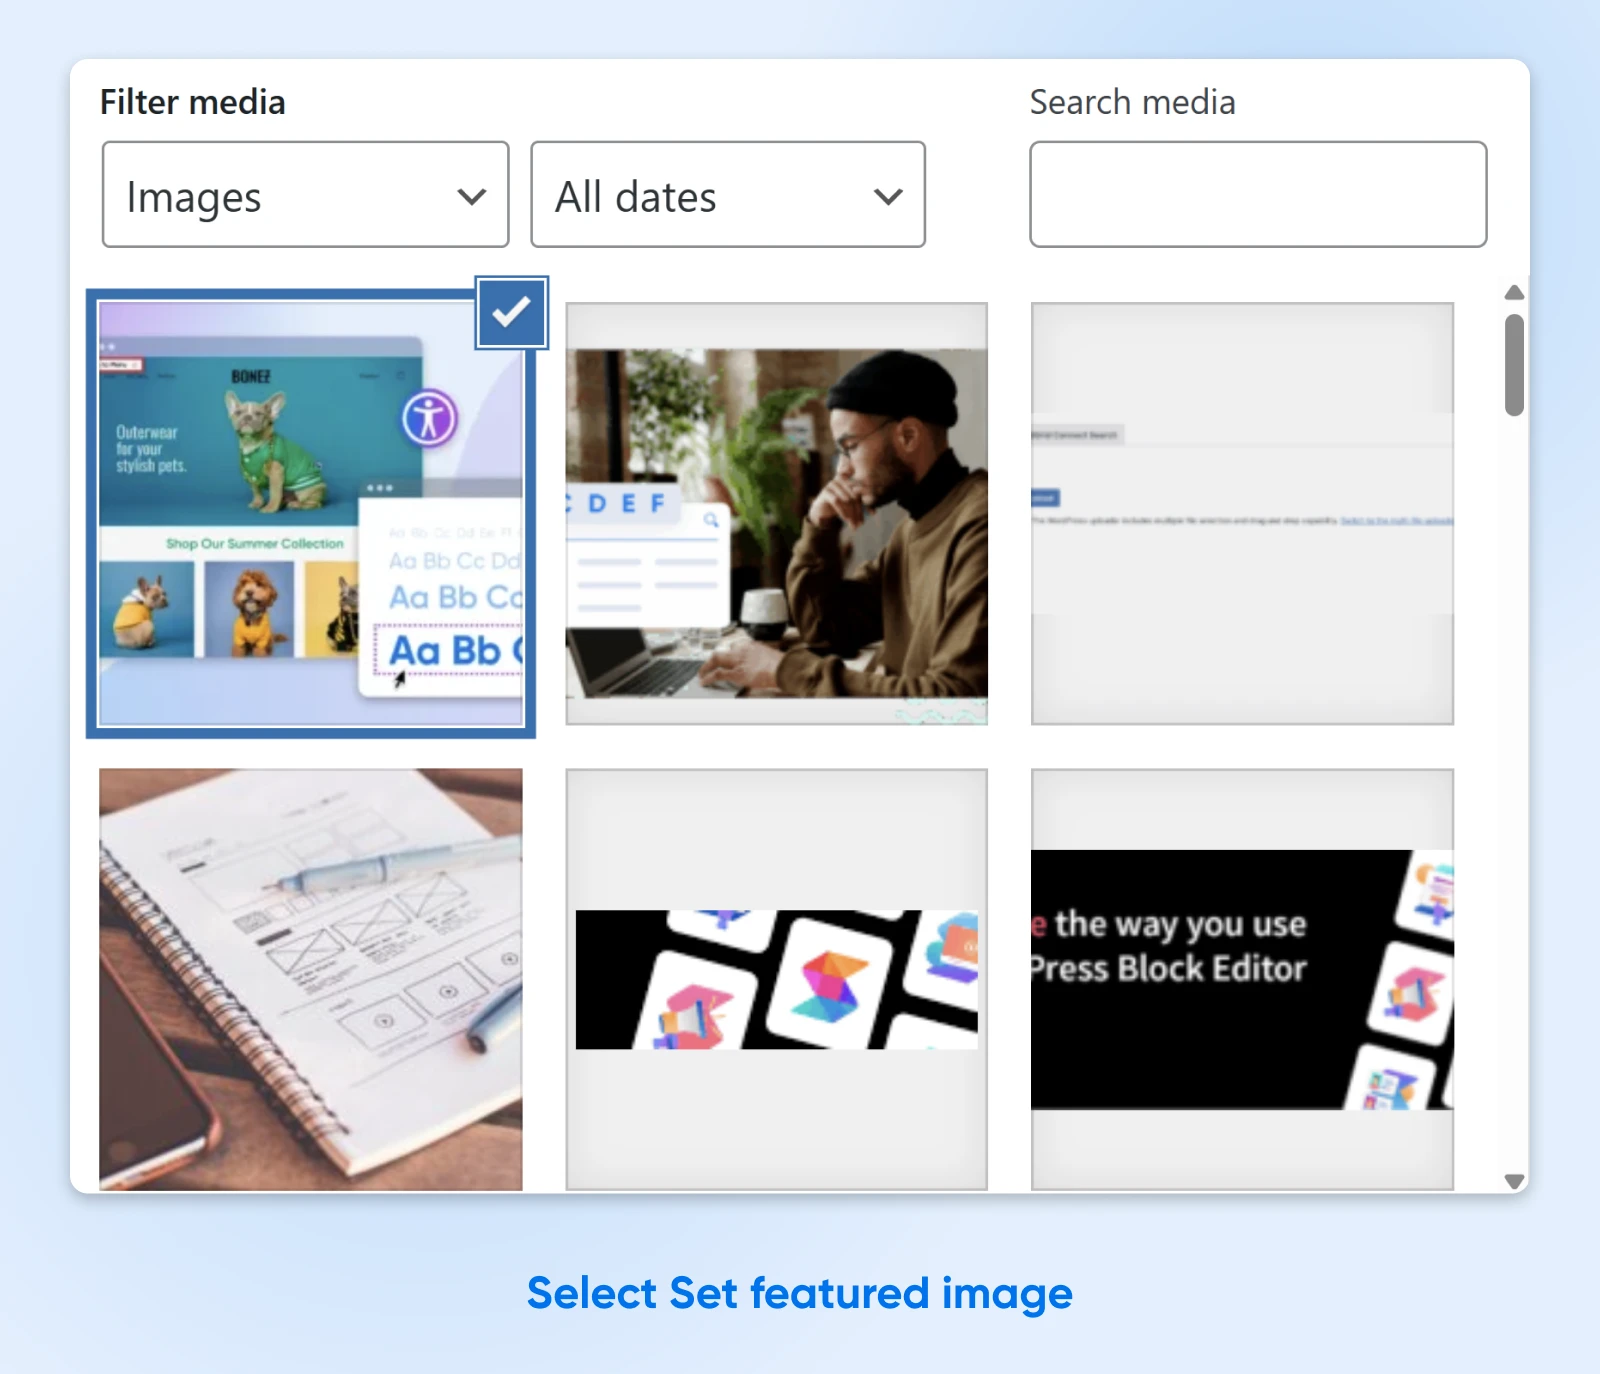
Click on Set featured image.
This will open a pop-up where you can upload your media file. Alternatively, you can select an image from your Media Library.
If you need to adjust the size, find the Edit Image button. Use the editing options to scale, crop, rotate, or flip the image as needed.
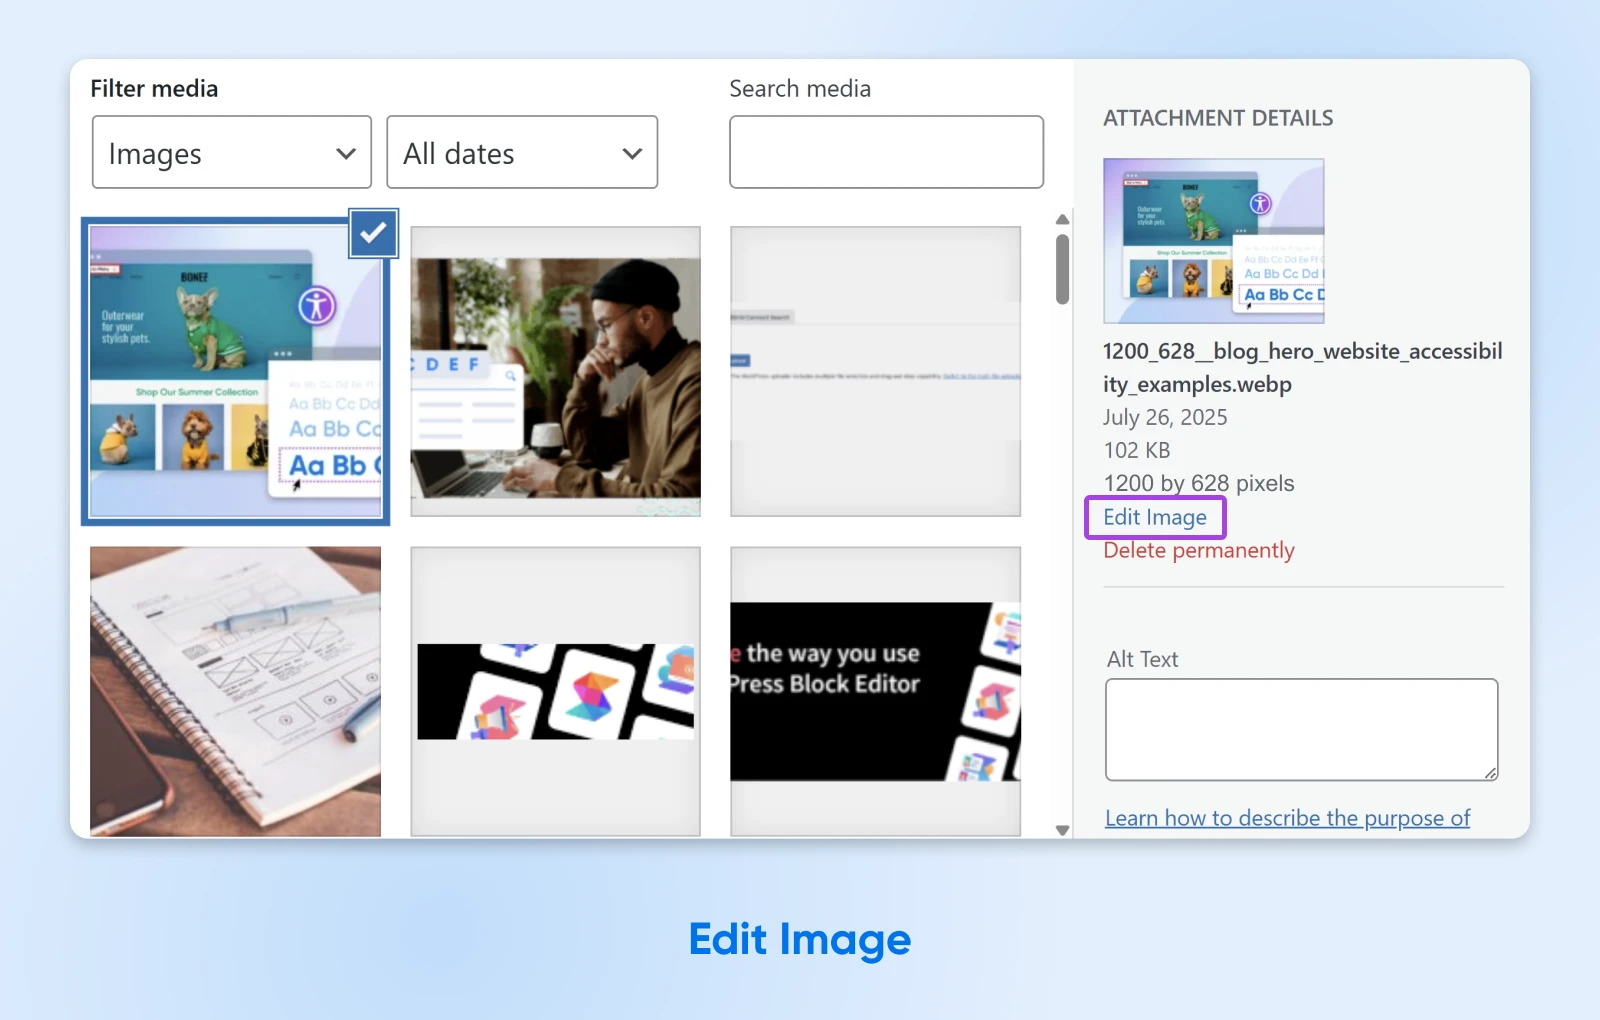
Happy? Hit Set featured image. You’ll now see a preview of the image while you create the post.
Before you publish the post, preview it to make sure the featured image is showing.
Remember that your theme may require more specific dimensions to work correctly. Check your theme’s documentation if you experience any hiccups along the way.
Manage Your Featured Images With Plugins
If doing this all manually sounds like too much hassle, there are WordPress plugins that can set featured images for you.
For example, Auto Featured Image will automatically use the first photo in your post as the featured image. And Default featured image lets you select a placeholder picture that will be displayed if you forget to set a featured image.
Best Practices for Making Your Featured Images Pop
That’s the basics covered. But you might be wondering how you can squeeze more juice out of your featured images.
The guidelines below should help you realize their full potential!
Always Choose an Image That Sells the Post
The best featured images are rarely subtle. They grab your attention and lead you toward the full article.
Try to choose a featured image that highlights what your content has to offer.
Say you run a food blog. Whenever you publish a new recipe, your featured image could be a photo of the finished meal.
This example from the food blog Half Baked Harvest shows how strong, visually-rich featured images can clearly convey what the post is about while encouraging readers to explore individual recipes.
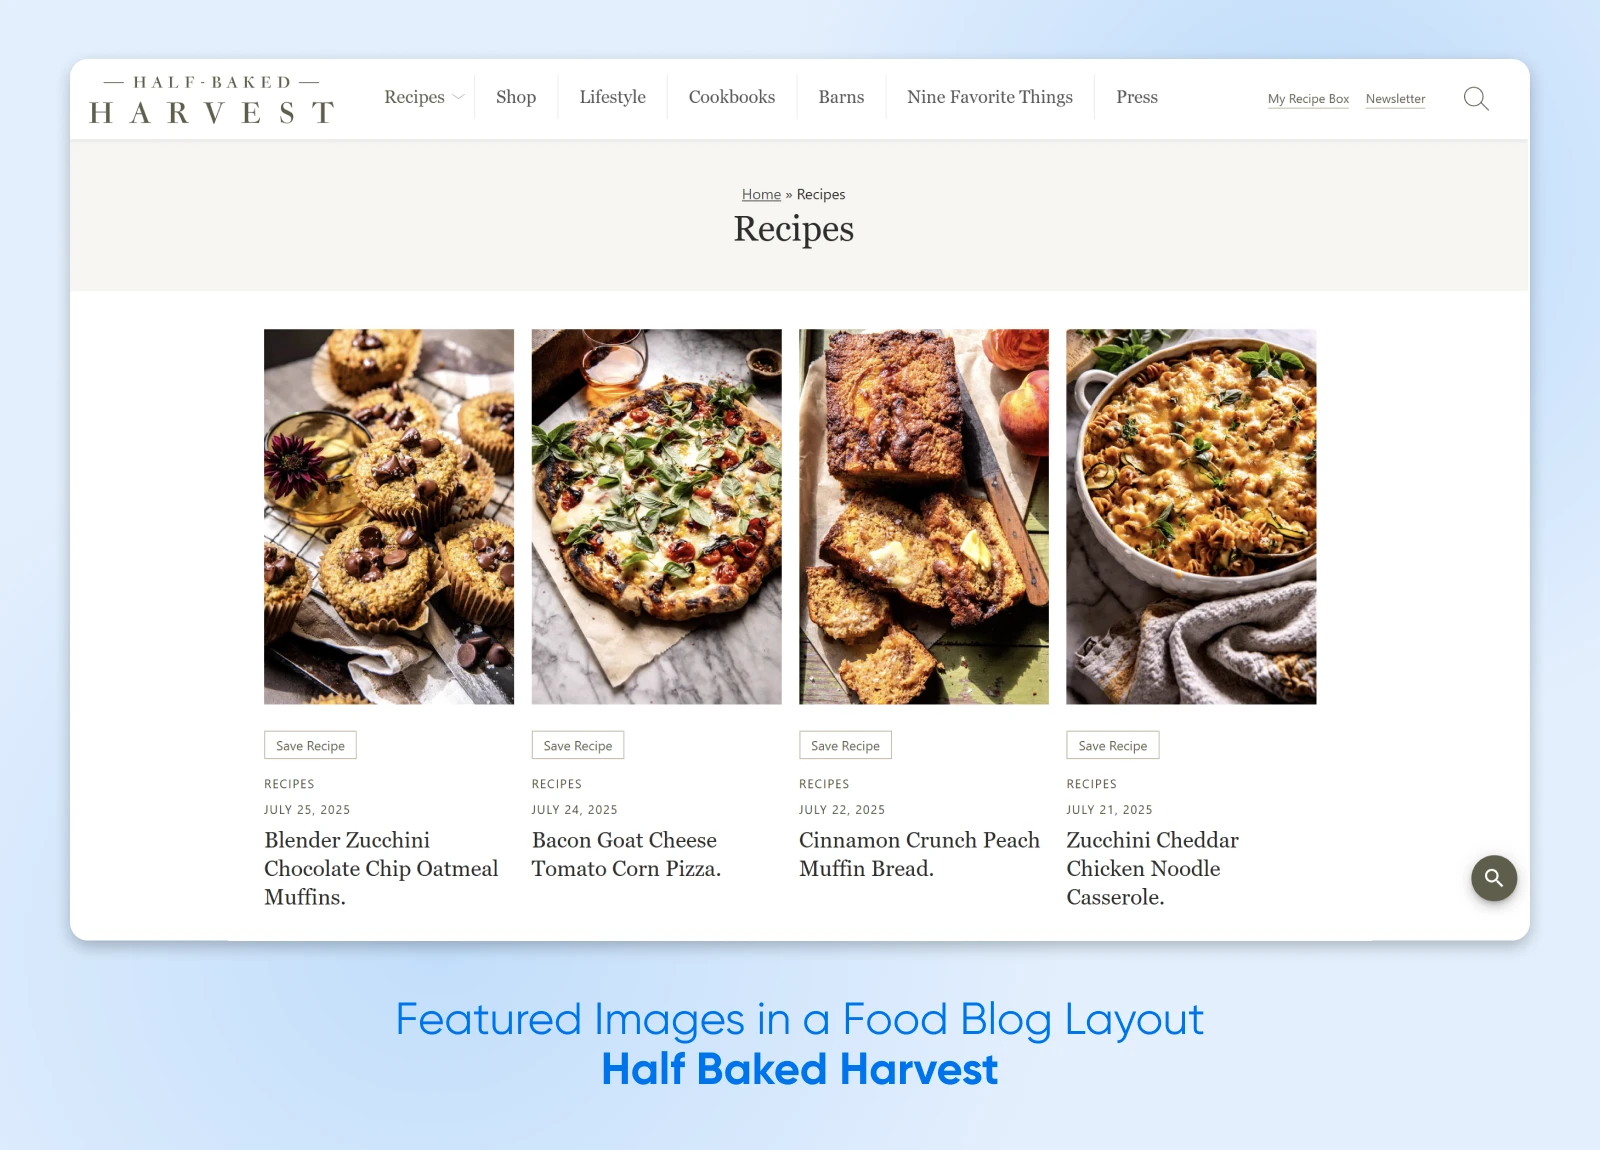
An appetizing plate of colorful ingredients is way more likely to attract the attention of your audience than a generic cooking graphic.
Avoid Using Copyrighted Images
As you roam around the web, you may stumble across a photo that would make a perfect featured image.
Before you grab a copy and upload it to your website, take a moment to check for copyright. There’s a fair chance that it belongs to someone. If you used this image without their consent, you’re leaving yourself wide open to a heap of legal issues.
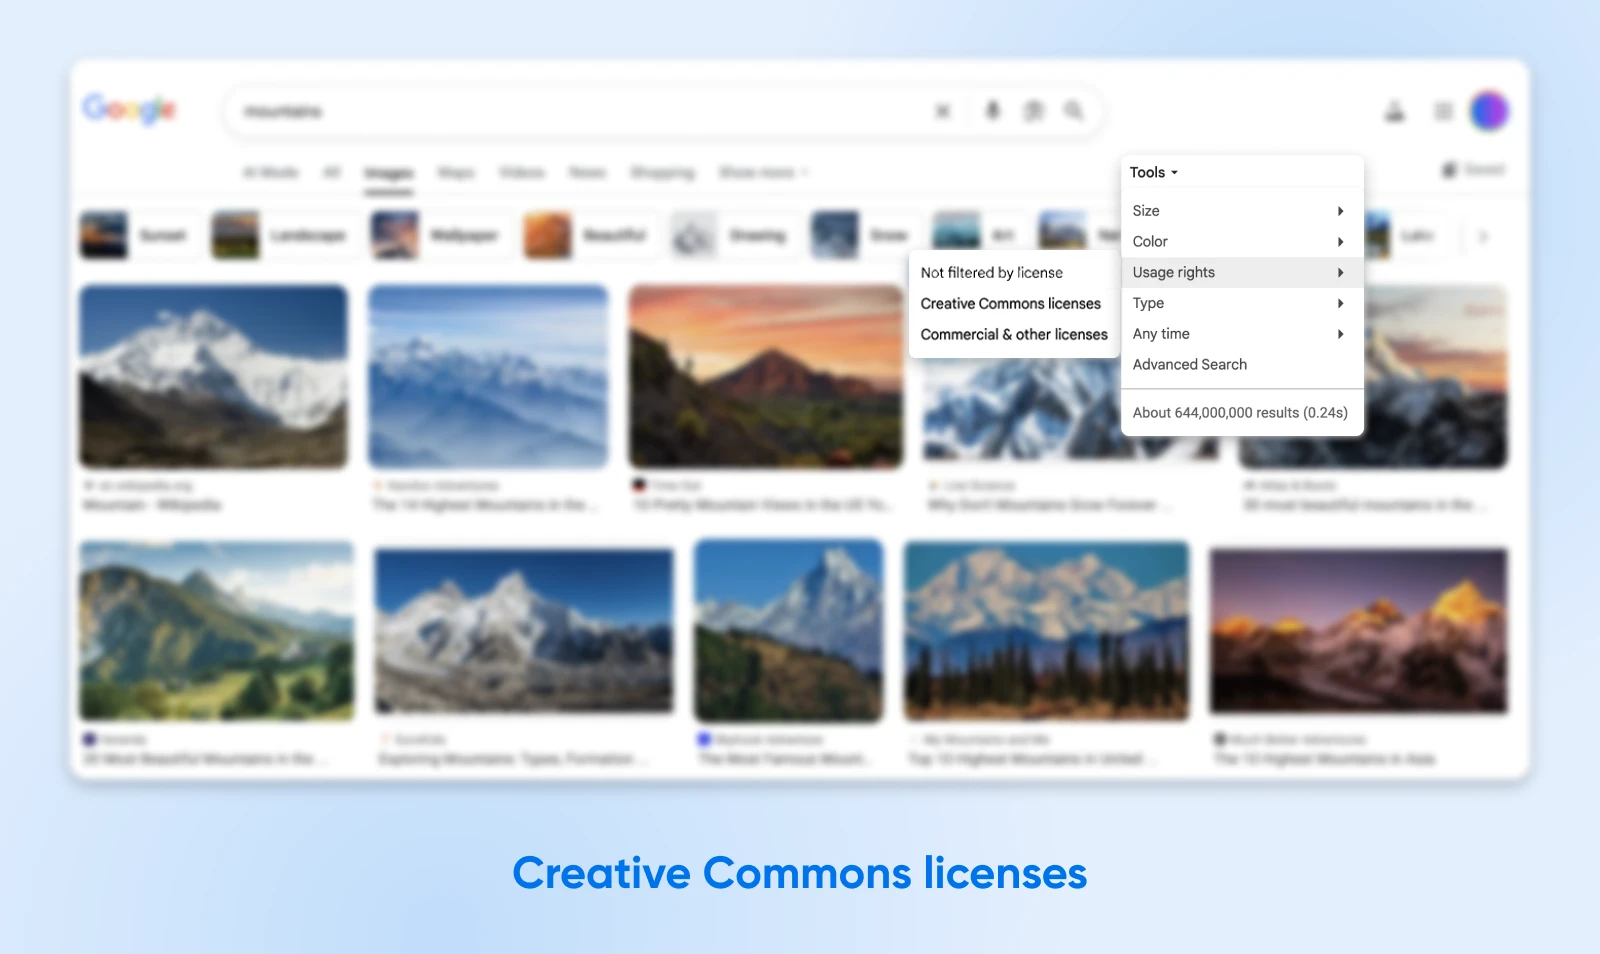
The good news is that there are millions of images available for use under a Creative Commons license. These are generally free to download and use on your website, unless you’re using them for commercial purposes.
To find Creative Commons images, visit Google Image and click on Tools > Usage Rights > Creative Commons licenses. Once you refine your search, you’ll get a wealth of free images to choose from.
Can’t find what you need? Try visiting some dedicated free stock platforms, like Pexels and Unsplash. The content here is also free to use, as long as you credit the creator.
💡Pro tip: Want to avoid the issue of copyright altogether? Create your own featured images. Scroll down to see our top tutorials on creating visual content.
Optimize Your Featured Images To Improve Performance
If you publish posts on a regular basis, featured images will start taking up a lot of space in your Media Library. If they aren’t optimized properly, these photos could negatively affect your site’s performance.
By optimizing your images, you can reduce their file sizes. That means they take up less storage space and load faster — an important factor in achieving a solid Core Web Vitals score.
Fortunately, it’s relatively easy to resolve this common image issue. Plugins like TinyPNG can automatically compress images as you upload them. Plus, this plugin can bulk optimize JPEG, PNG, AVIF, and WebP images already in your Media Library.

Regenerate Old Thumbnails After Updating Your Theme
If you use the method mentioned earlier to set new default image sizes, you might come across a problem: any images you uploaded previously will be stored at the original default sizes.
There are two ways to fix this:
We strongly recommend the second option.
Our go-to plugin here is Force Regenerate Thumbnails. After you install and activate the plugin, go to Tools > Force Regenerate Thumbnails and hit the big blue Regenerate All Thumbnails button.
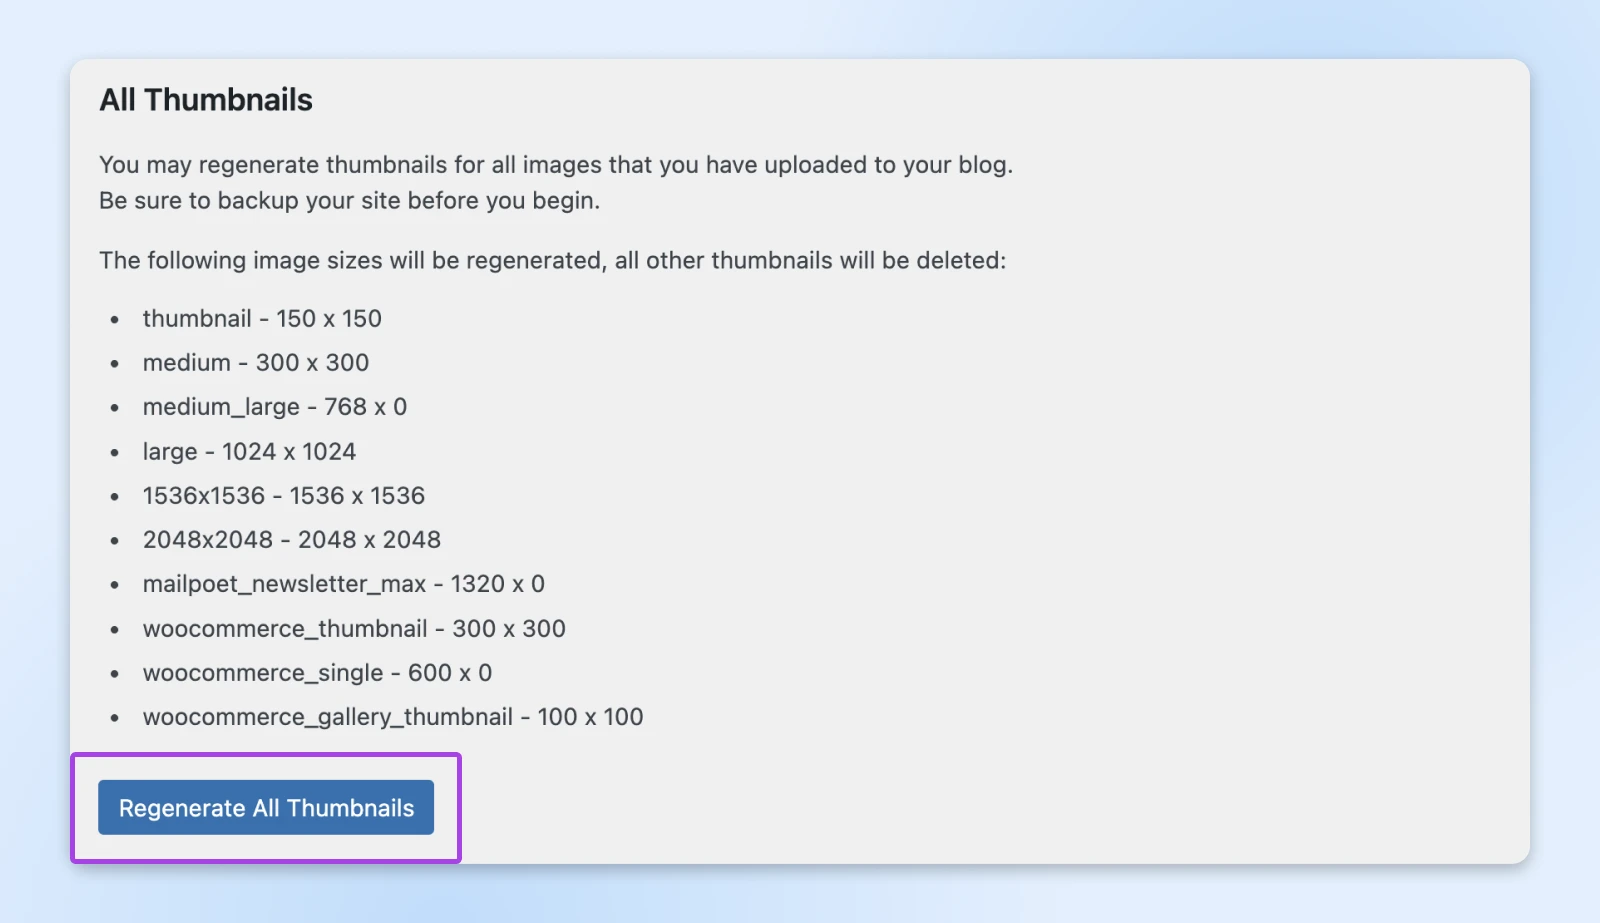
This will automatically update all featured images with the current sizing.
Optimize Your Featured Images for Search
As a website owner, you probably pay attention to search engine optimization (SEO) already. But did you know that your featured image can contribute to your rankings?
You just need to make a few tweaks to unlock the benefits.
First, make sure to add some descriptive alt text to your featured images. This will help search engines and screen readers to figure out what the image is depicting.
For instance, add something like, “Orange and white cat standing in a pumpkin patch.”
To extract the maximum SEO benefit, include the post’s keyword in the alt text. That way, Google can understand what the post is about and rank it higher for related queries.
Similarly, you can include these target keywords in the title, caption, and description for the featured image.
Put Some Effort Into Social Post Thumbnails
Social media is where many people will discover your blog posts.
To make a good first impression, it’s worth taking the time to optimize your featured images for these platforms.
Easily customize your social media links using a plugin like Yoast SEO. The premium version enables you to see previews of your X and Facebook thumbnails.
To get started, install and activate the Yoast SEO plugin.
Once it’s activated, Select the Yoast SEO icon from the left-hand navigation menu and go to Settings.
Then click Site features under “General.”

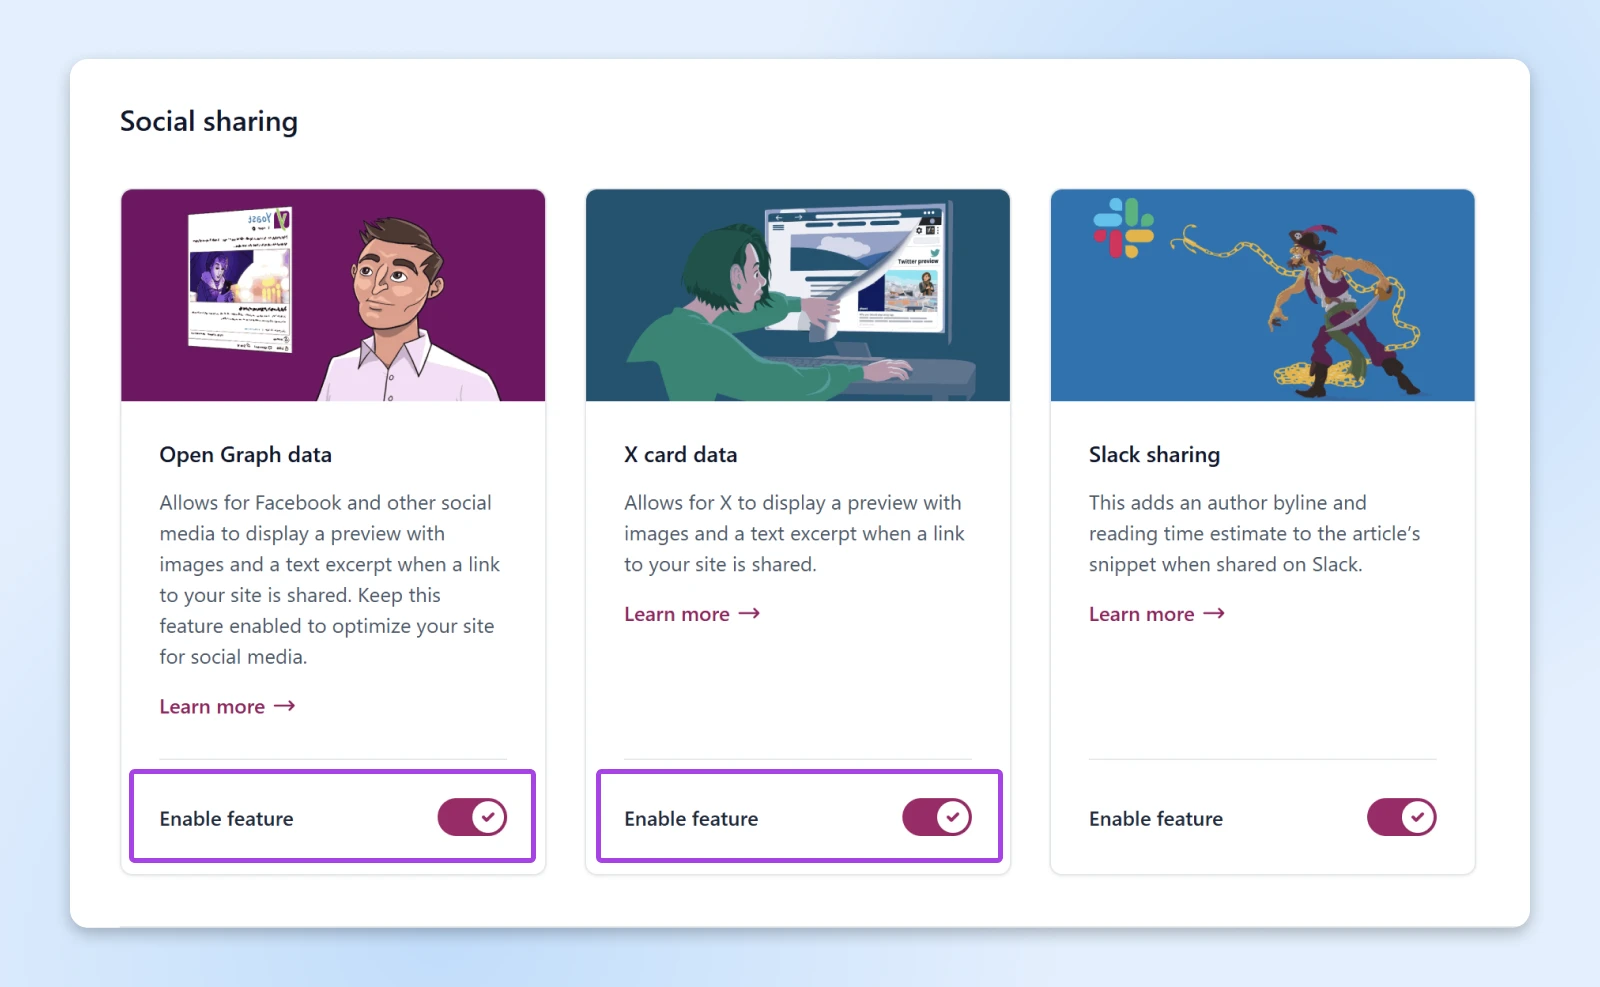
Then scroll down to Social sharing to ensure OpenGraph and X card data are enabled.
Go to Yoast SEO > Settings > Site representation to add your social media profiles.
Then right under “Site representation” click Site basics to set a default social image for posts that don’t have one.
From then on, when you’re in post editor, you can click the Yoast icon in the sidebar to pull up post settings.
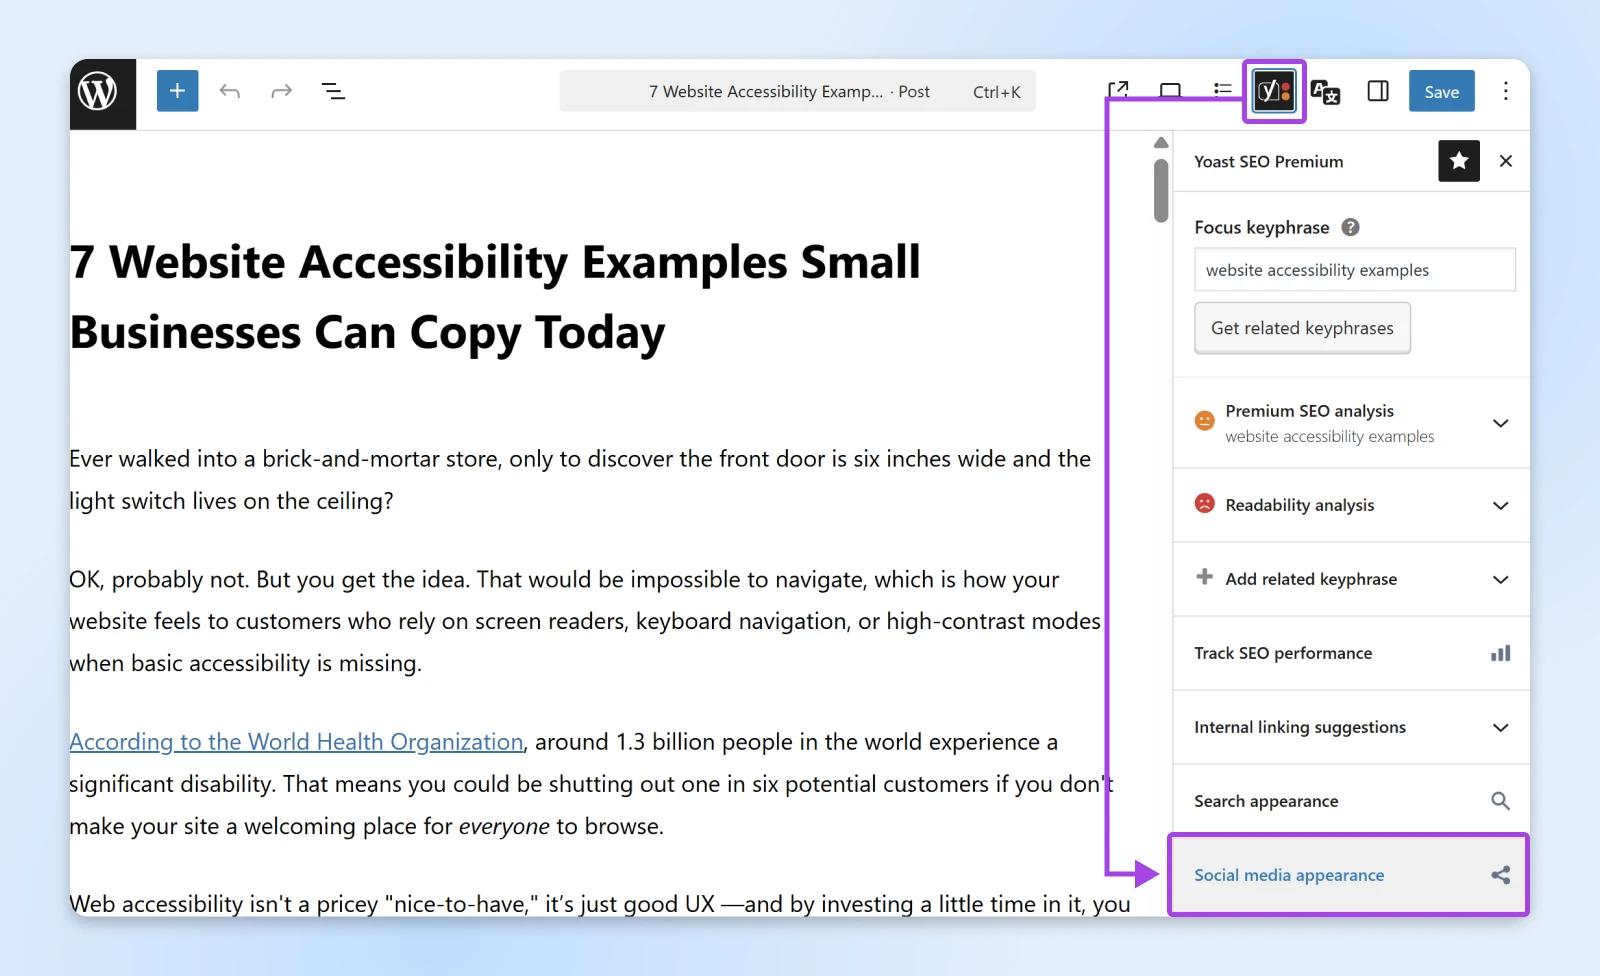
Open the Social tab to customize the social previews, including titles and meta descriptions.
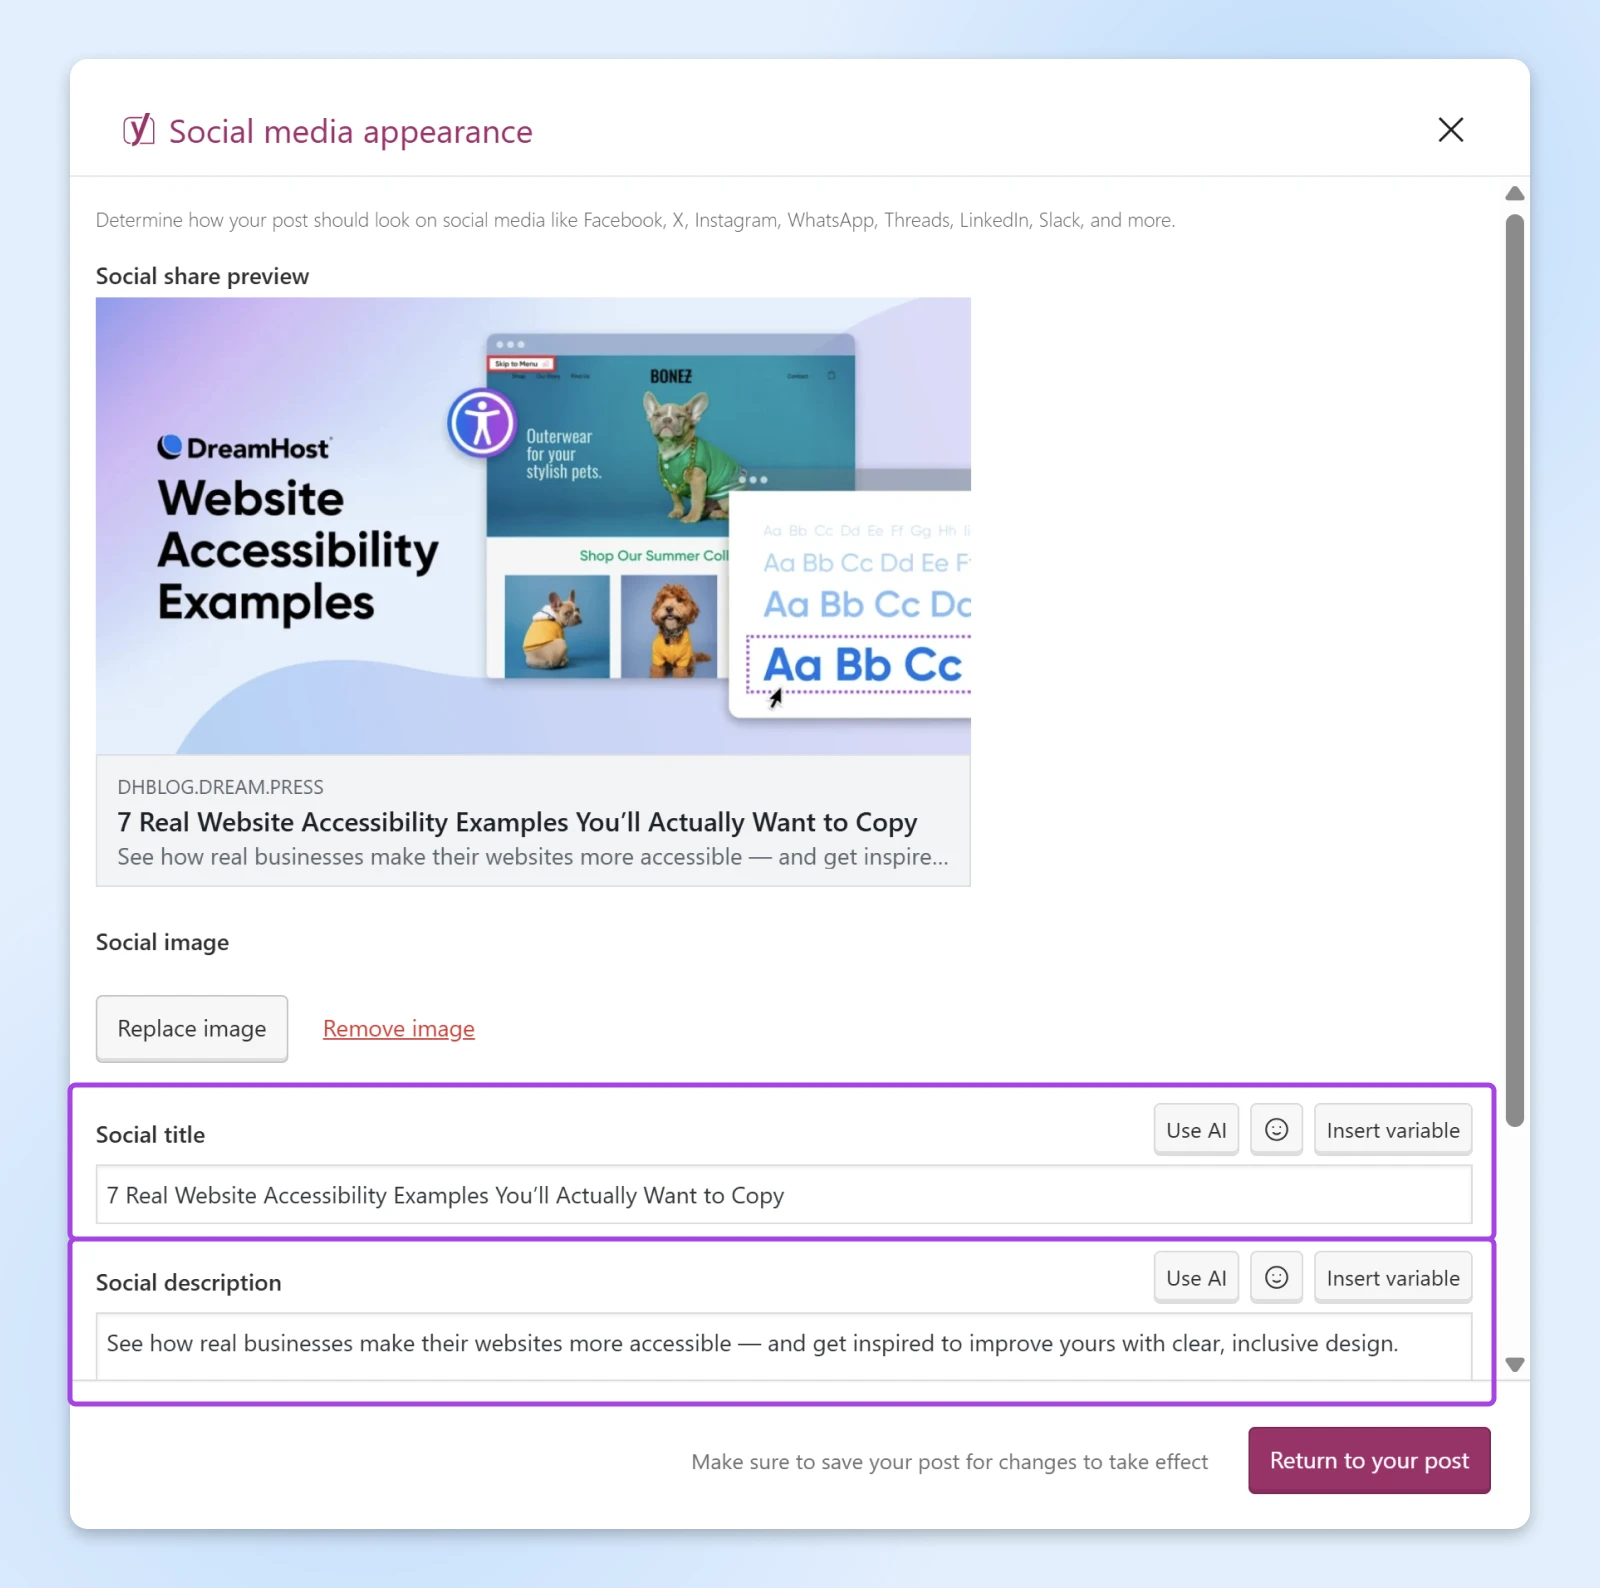
These fields control how your post appears when shared — giving you full control over the thumbnail, snippet, and social preview.
Once you publish the post on social media, it will have a featured image and snippet that conveys precisely what the article is about.
Creating Great Visual Content for Your Blog
Want to design and optimize your own blog post images? Here are some expert tips from our design team:
Featured Images Are Your Secret Weapon
Featured images don’t always receive the attention they deserve.
Sure, the header photo isn’t the most important part of your blog post — but it might just nudge more people to actually read what’s below.
Every time you publish a new post, be sure to:
- Set a featured image.
- Choose something that sells your post.
- Check for copyright information.
- Add a descriptive alt title.
- Optimize image sizes for better performance.
- Upload a version for social media.
Want to squeeze even more out of your content? Consider upgrading to DreamHost Shared Hosting.
Our plans include unlimited traffic and guaranteed 100% uptime. That should keep your visitors happy!

Pro Services – Web Design
DreamHost Makes Web Design Easy
Our designers can create a gorgeous website from SCRATCH to perfectly match your brand and vision — all coded with WordPress so you can manage your content going forward.
Learn More
Did you enjoy this article?

